[SOLVED] "This copy of the Install OS X Mavericks application can't be verified. It may have been corrupted or tampered with during downloading."

62 Comments

[SOLVED] "This copy of the Install OS X Mavericks application can't be verified. It may have been corrupted or tampered with during downloading."

2018 UPDATE: This issue also occurs when attempting to install macOS High Sierra, with a slightly different error message: “This copy of the Install macOS High Sierra application is damaged, and can’t be used to install macOS.”

While trying to do a clean install of Mavericks onto a MacBook Air I received the error: "This copy of the install OS X Mavericks application can't be verified. It may have been corrupted or tampered with during downloading."

I found the error wasn't due to a corrupted Mavericks installer, but an incorrect date setting, caused by a flat battery. Since I had already blown away the previous Mac OS X install I needed to fix the time while booted from the Mavericks installer.

If you're experiencing this issue, here's what to do:

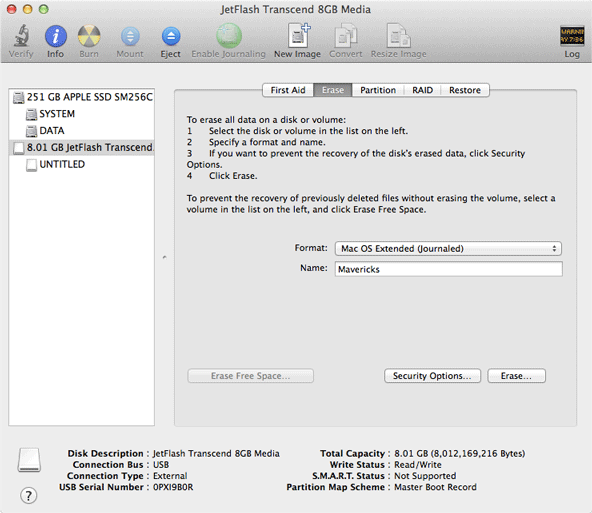
Boot into the Mavericks Installer. You can learn how to make bootable Mavericks USB here.

Open Terminal (Utilities → Terminal)

Check what the date is currently set to by typing "date". If it's incorrect type:

	date mmddHHMMYYYY
Substitute
mm = current month (e.g. February = 02)
dd = current date (e.g 31)
HH = current hour (e.g. 6pm = 18)
MM = current minute (e.g. 05)
YYYY = current year (e.g. 2013)

Hit return and quit Terminal. Now attempt the Mavericks install again, if it fails again it's not a date issue and I would try downloading and recreating your Mavericks installer.


62 Comments

Creating a Bootable OS X/macOS USB Installer

Comment

Creating a Bootable OS X/macOS USB Installer

Since the release of Mac OS X 10.6 (Snow Leopard) I've carried around a bootable USB on my keychain. It has made my life a lot easier reinstalling OS X/macOS without an Internet connection and troubleshooting Macs without a recovery partition. I also much prefer clean installs of the operating system, using this method vs updating from a previous version of OS X/macOS.

This post will go through the process I use to create a bootable OS X/macOS installer.


Requirements

  • At least an 8GB USB, you can also use a FireWire or Thunderbolt drive.

  • A Mac running 10.6.8 (Snow Leopard) or newer.

  • A fast Internet connection to download the OS X/macOS installer.


Step 1: Download OS X/macOS

If you haven’t already you can download the desired Install macOS application from the Mac App Store. Here are some direct links:

Once it's downloaded the installer automatically opens, simply quit it.

OSXMavericksInstaller.png
InstallOSXQuit.png

Step 2: Prepare the USB

We are about to erase everything on the USB, make sure you have copied off anything you wish to keep. 


Open Disk Utility (/Applications/Utilities/Disk Utility), select your USB drive from the list and click the ‘Erase’ tab.

Set format to: Mac OS Extended (Journaled)

Set name to either: Mavericks, Yosemite, El Capitan, Sierra, High Sierra, Mojave, Catalina, Big Sur, Monterey

DiskUtility.png


Click ‘Erase...’ and 'Erase' again, then enter your password if required. 

Step 3: Copy over the files

Open Terminal  (/Applications/Utilities/Terminal) and paste the appropriate command.

For Mavericks (10.9):

sudo /Applications/Install\ OS\ X\ Mavericks.app/Contents/Resources/createinstallmedia --volume /Volumes/Mavericks --applicationpath /Applications/Install\ OS\ X\ Mavericks.app --nointeraction

For Yosemite (10.10):

sudo /Applications/Install\ OS\ X\ Yosemite.app/Contents/Resources/createinstallmedia --volume /Volumes/Yosemite --applicationpath /Applications/Install\ OS\ X\ Yosemite.app --nointeraction

For El Capitan (10.11):

sudo /Applications/Install\ OS\ X\ El\ Capitan.app/Contents/Resources/createinstallmedia --volume /Volumes/El\ Capitan --applicationpath /Applications/Install\ OS\ X\ El\ Capitan.app --nointeraction

For Sierra (10.12):

sudo /Applications/Install\ macOS\ Sierra.app/Contents/Resources/createinstallmedia --volume /Volumes/Sierra --applicationpath /Applications/Install\ macOS\ Sierra.app --nointeraction

For High Sierra (10.13):

sudo /Applications/Install\ macOS\ High\ Sierra.app/Contents/Resources/createinstallmedia --volume /Volumes/High\ Sierra --applicationpath /Applications/Install\ macOS\ High\ Sierra.app --nointeraction

 For Mojave (10.14):

sudo /Applications/Install\ macOS\ Mojave.app/Contents/Resources/createinstallmedia --volume /Volumes/Mojave --applicationpath /Applications/Install\ macOS\ Mojave.app --nointeraction --downloadassets

For Catalina (10.15):

sudo /Applications/Install\ macOS\ Catalina.app/Contents/Resources/createinstallmedia --volume /Volumes/Catalina --nointeraction --downloadassets

For Big Sur (11):

sudo /Applications/Install\ macOS\ Big\ Sur.app/Contents/Resources/createinstallmedia --volume /Volumes/Big\ Sur --nointeraction --downloadassets

For Monterey (12):

sudo /Applications/Install\ macOS\ Monterey.app/Contents/Resources/createinstallmedia --volume /Volumes/Monterey --nointeraction --downloadassets

Hit return, type in your password, then hit return again. Don’t worry if it looks like you are not typing anything, it's just Terminal hiding your password input for added security. Depending on your USB, the copy process takes approximately 20 minutes to finish.


That's it! You should now have a bootable OS X USB installer. Go test it out by plugging it into a Mac that is turned off, pressing the power button and then holding down the 'option' key.

I’d like to thank tywebb13  for sharing the above Terminal command on the MacRumors forums.


If you need any help feel free to leave a comment. 

Comment