There are several key pieces to a successful education iPad deployment. This guide is a good starting point towards understanding how the pieces come together.
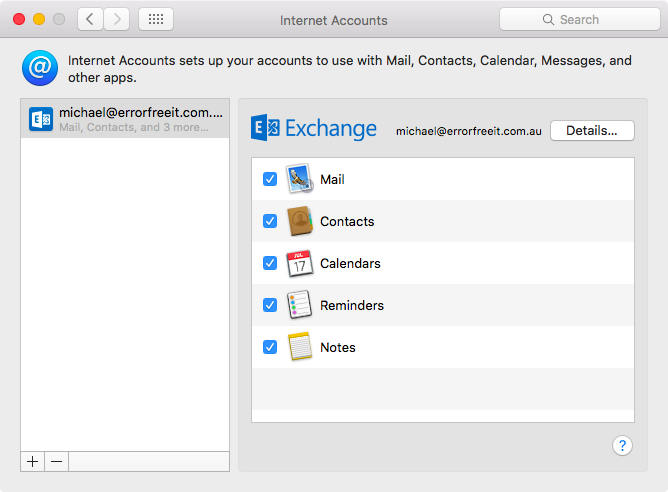
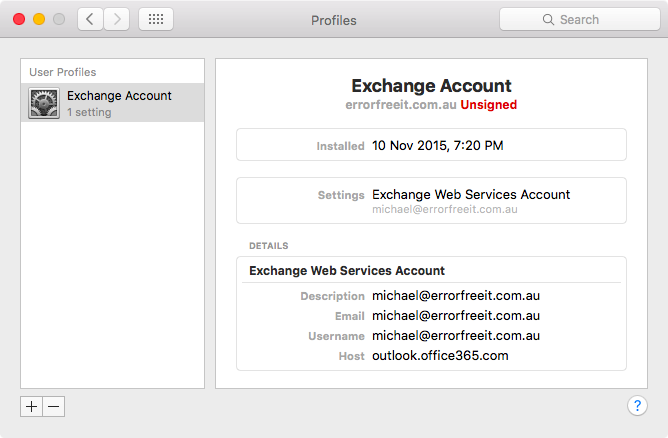
Mobile Device Management (MDM)
An MDM unlocks the real potential of iPads in education. There are hundreds of MDM vendors, in Australia the most common one is Jamf Pro (formerly Casper Suite). Jamf have a great track record for supporting new features as they come out and offer substantial discounts to educational institutes.
All reliable MDMs are subscription based, where you pay X amount per month/year per iPad.
An MDM will allow for:
- wireless deployment of apps and settings to iPads, no more syncing with iTunes/Apple Configurator or manually downloading onto each device.
- keeping an inventory of your iPads.
- the features discussed below; Device Enrolment Programme, Volume Purchase Programme and Apple School Manager.
Device Enrolment Programme (DEP)
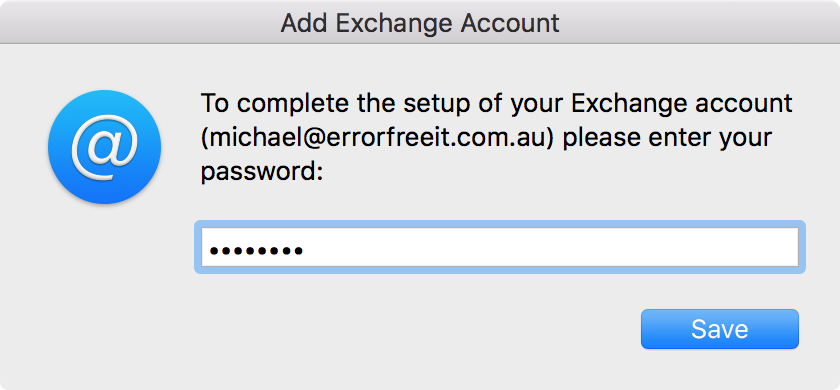
Once a school is enrolled for DEP, new iPads purchased from an Apple Authorised Reseller are registered with the schools DEP account. iPads registered with DEP will automatically talk to the schools MDM (e.g. Jamf Pro) and automate the set up of the iPad, I.T. never needs to see the device.
Volume Purchase Programme (VPP)
VPP allows for the bulk purchase of app licenses and many apps offer a 50% discount when purchasing quantities of twenty or more at a time.
Once a purchase in the VPP portal has been made, the app licenses will appear in your MDM and you can select the devices you wish to deploy that app to.
Credit can be added to a VPP account either via credit card or by purchase order.
Apple School Manager (ASM)
Apple School Manager is a teacher's dream - it allows them to remotely view, lock and control iPads in the classroom. Apple has a 3 minute video demonstrating the functionality of the Classroom app (part of ASM).
Historically iPads have always been a single user device, so when they are shared (often the case in schools) this can cause problems especially if students delete other students work. With ASM, iPads gain security for shared use as each student is given their own unique account and passcode, keeping their work safe.
Their work is also synchronised with iCloud allowing them to pick up any school iPad, log in and have their previous work appear on that iPad.
Registering a school for DEP, VPP and ASM is free and can be completed here.
Apple Caching Service
With lots of apps, updates and iCloud data being downloaded from the Internet it is paramount to have a Mac mini set up with macOS Server and the Caching Service. The Caching Service reduces the amount of data downloaded over the Internet connection and speeds up delivery of repeat data.
How it works
The first time an app is downloaded from the Internet, during that initial download it is cached on the Mac mini. If another device requests the same update it doesn’t need to download it from the Internet again, instead it is rapidly downloaded from the local Mac mini.


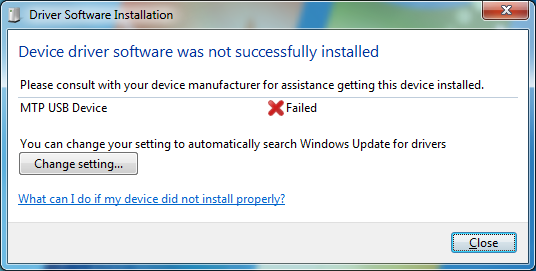
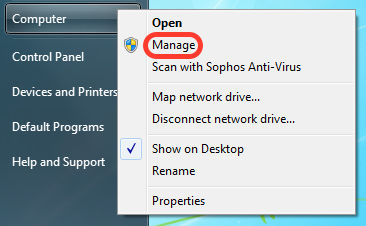
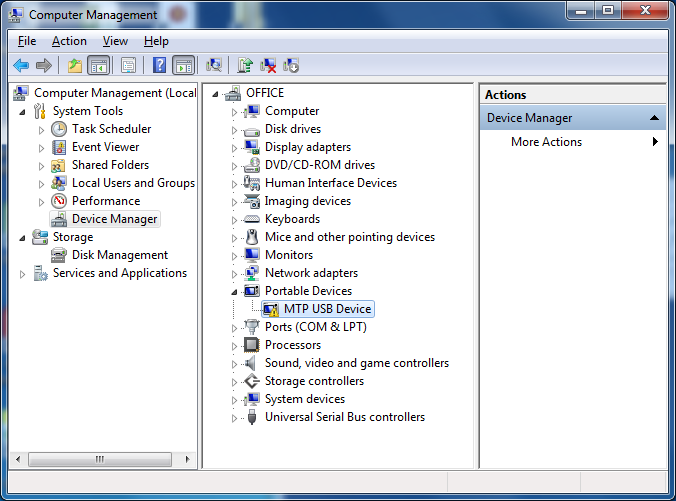
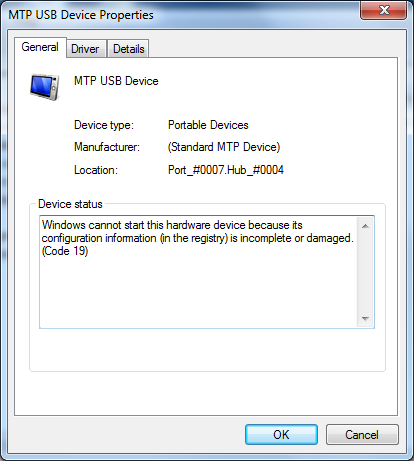
![[SOLVED] Unable To Access iPhone Photos In Windows 7](https://images.squarespace-cdn.com/content/v1/52592f30e4b0daa056cf446d/1449878599627-9RGXJVFHRWCR8Q4M9XL6/image-asset.png)