


People making the switch to Mac often ask, “How do I install programs and what’s the equivalent to ‘Add/Remove Programs’ on a Mac?” To answer this question I have put together a guide that covers the three main methods of installing and uninstalling applications in Apple’s Mac OS X:

Mac App Store: Apple introduced the MAS back in Mac OS X 10.6.6 (Snow Leopard) and it is now the preferred method for installing Apple approved applications. The Mac App Store notifies users when an app update is available and a new feature in OS X 10.9 (Mavericks) can even automatically install updates for you. Applications purchased through the MAS are linked to your Apple ID, allowing you to install purchased apps on multiple Macs for no additional charge. Another benefit is that you don’t need to keep track of any serial numbers.
Install: Simply click the price tag button and then click ‘Buy App’ to confirm the purchase. The app icon then literately jumps out of the MAS and into your Lauchpad.
Uninstall: Open Launchpad, click and hold your cursor on an app icon until you see the app icons shaking (I imagine that they are scared that you are going to delete them), then click the little cross in the top left corner of the app icon and confirm by clicking ‘Delete.’
Examples: iBooks Author, Flutter, Muse

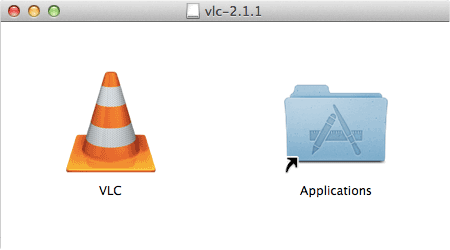
Drag & Drop: These generally download as a .dmg (disk image) file, however I have also come across .zip and tar.gz (compressed archive) files, which all just contain a .app file. Apps are often distributed this way if they do not meet MAS requirements. You will find many community driven applications (open source) distributed this way as their licensing conflicts with Apple’s MAS Terms of Service.
Install: Double click to mount the .dmg file and drag the app icon into your Applications directory to install. Often .dmg files will include an alias to your Applications directory, so you don’t need to fiddle with opening another Finder window.
Uninstall: The easiest way to remove these apps is with FreeMacSoft’s AppCleaner. Otherwise you can manually remove the app by going to Applications in Finder and dragging the app into the Trash.
Examples: Google Chrome, Mozilla Firefox, VLC

Installer Package: These are generally used if an application needs to install files outside of the Applications directory and/or needs to run an install script. An install of a .pkg or .mpkg file looks very similar to setup wizards found on the Windows operating systems.
Tip: If you ever want to extract something out of a .pkg file, you can use the free app ‘unpkg.’ It’s great for extracting the .app file in situations where an installer will refuse to run on your bleeding edge operating system.
Install: Double click the installer package file and click through the wizard.

Tip: I recommend installing a free Finder QuickLook plug-in called ‘Suspicious Package,’ it presents detailed information about what an installer package is configured to do. Download Suspicious Package here, mount the .dmg and then click ‘Go’ → ‘Go to Folder’ then type ~/Library/.
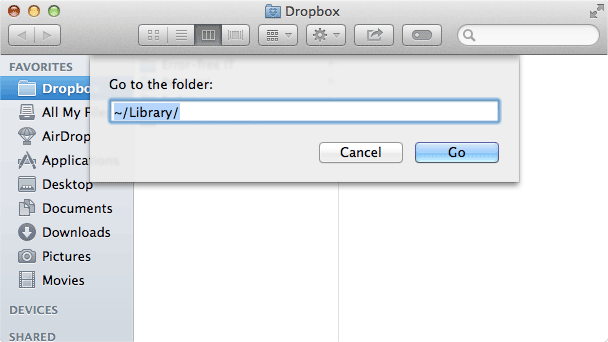
Create a new folder called ‘QuickLook’ and drag ‘Suspicious Package.qlgenerator’ into it.

You will need to log out or restart your computer for Finder to detect the plug-in. Once installed, simply select a .pkg file and hit space to see detailed information about that package.

Uninstall: By far the easiest way is to use AppCleaner. The next best thing is using a tool such as Suspicious Package to find where the package places files and manually go around and delete them. If you are feeling really geeky you could avoid using Suspicious Package and use the Terminal command ‘lsbom -lfs `pkgutil --bom /PATH/TO/PACKAGE/FILE.pkg`’ to get an idea of where the package places files.
Examples: Adobe Flash Player, Oracle Java, Microsoft Office
Unless you have used AppCleaner you’ll find settings/configuration files created by that application are left behind. If you want an application to behave like it’s never been opened before, you will need to trash any preference files containing to the application or developer's name. Open Finder and click ‘Go’ → ‘Go to Folder’ then type the following paths:
User specific settings: ~/Application Support/ and ~/Preferences/
System wide settings: /Library/Application Support/ and /Library/Preferences/