Viewing entries tagged
mac

Advanced Printer Deployment with Addigy (MDM)

Comment

Advanced Printer Deployment with Addigy (MDM)

Standard Printer Deployment Limitations

The documented process for deploying printers with Addigy and other MDMs (reliant on configuration profiles) is simply not as good as printer deployment methods with Munki. Specific drawbacks with the MDM approach include:

No Printer Driver Detection
Configuration profiles do not check if the required printer driver (PPD) is available before adding a printer. If the driver is not present, the printer is still added but with a generic (feature limited) printer driver. Even if the driver is installed later on, the printer will not update to use the correct driver.

No Automated Printer Reinstall
Printers are only added during the install of a configuration profile. If a user removes a printer in System Preferences it is not automatically reinstalled, even though the printer configuration profile is still present.

No Automated Printer Removal
Removing the configuration profile that originally added the printer does not remove the printer. The printer still needs to be manually removed via System Preferences or a script.

Unable to Customise Printer Settings
Administrators often need to configure printer options such as single/double sided printing, A4/US Letter paper size, etc. Printer configuration profiles are yet to include these customisations.

Unable to Alter Printer Settings Over Time
Printers get replaced, networks change and finance departments decide grayscale printing should be the new default. The ability to push out new versions of the same printer with slightly different settings is useful.

Printer Sharing is Enabled
Printers are being added with the “Share this printer on the network” option enabled. I have yet to come across a situation where printer sharing was intentionally enabled, it should be disabled by default.

No Printers in Self Service
Unlike software, profiles cannot be added to Self Service. An issue for organisations that want staff to pick and choose printers.

Minor Gripes
Printers deployed with Addigy are added to CUPS with a generic printer name (e.g. mcx0, mcx1, etc).
Printer profiles installed by Addigy are not signed.

Advanced Printer Deployment Method

The Munki nopkg (no package) method of deploying printers addresses all the issues listed above. I have rewritten the scripts to work with Addigy.

1) To personalise the scripts below please enter your printer details.


. .

2) Log into Addigy go to Policies > Catalog > Custom Software > Add Software +

3) Enter a Software Identifier that includes the printer’s display name. The version number should also match the one provided above. Optionally, prefix the name with the target organisation’s initials/short name, for example: SCHL - Leo (Year 7).

4) Enter a brief description, set the category to Printers and set a custom icon, it will be displayed in Self Service.

5) Scroll past Upload Files and copy and paste in your personalised Installation Script.

#### Installation Script ####

# Script is based off of nopkg code written by Walter Meyer and Nick McSpadden in the early days of Munki. Rewritten in 2019 by Michael Page for use with Addigy.

### Printer Variables ###
# Variable current_version is useful for deploying printer alterations over time. The version should always match the Custom Software version in Addigy.
# Incrementation examples: 1.1.0 = Printer location description changed, 2.0.0 = Printer has been replaced with a newer model.
current_version="1.0.0"

# The printer name displayed to users, once printer has been deployed this should not change, as changing the name will result in duplicate printers.
display_name="Leo (Year 7)"

# Physical location of the printer.
location="Safari Building"

# Protocol used to connect to the printer (dnssd, lpd, ipp, ipps, http, socket).
protocol="lpd"

# Network address of the printer can be an IP address, hostname or DNS-SD address.
# DNS-SD address example: "HP%20LaserJet%20400%20colorMFP%20M475dn%20(626EDC)._ipp._tcp.local./?uuid=434e4438-4637-3934-3737-a45d36626edc"
address="10.118.227.10"

# Path to printer driver (PPD).
driver_ppd="/Library/Printers/PPDs/Contents/Resources/HP Color LaserJet Pro M252.gz"

# Specific options for the printer.
# To find available options, manually add the printer to a Mac and run: lpoptions -p "$insert_cups_printer_name_here" -l
# To list installed CUPS printer queue names run: lpstat -p | /usr/bin/awk '{print $2}'
option_1="PageSize=A4"
option_2="Duplex=None"
option_3=""

### Nothing below this line needs to change. ###

# Function to convert dot separated version numbers into an integer for comparison purposes.
# Examples: "2.1.0" -> 2001000, "52.14.7" -> 52014007.
function version {
    echo "$@" | /usr/bin/awk -F. '{ printf("%d%03d%03d\n", $1,$2,$3); }';
}

# Set name to be lowercased display_name with only alphanumeric characters.
name=$(echo "$display_name" | /usr/bin/tr -dc '[:alnum:]' | /usr/bin/tr '[:upper:]' '[:lower:]')

# Ensure required printer driver is on disk.
/bin/ls "$driver_ppd"

# Determine if the printer was previously installed.
if [ -f "/private/etc/cups/deployment/receipts/${name}.plist" ]; then
    # Get the script version number that was used to install the printer.
    installed_version=$(/usr/libexec/PlistBuddy -c "Print :version" "/private/etc/cups/deployment/receipts/${name}.plist")
    echo "Previously installed version of ${name}: $installed_version"
else
    echo "Printer ${name} was not previously installed."
    installed_version="0"
fi

# If a matching print queue with that name already exists.
if /usr/bin/lpstat -p "$name"; then
    # If the installed printer version is equal (or somehow newer) to the printer version in this script.
    if [ "$(version "$installed_version")" -ge "$(version "$current_version")" ]; then
        # The printer installed is the current or newer version, no need to reinstall it.
        echo "The installed printer (${name}) is already up-to-date, no need to reinstall."
        exit 0
    fi
    # Printer installed is of a lesser version, therefore we will remove the outdated printer, ready for reinstall.
    echo "The installed printer (${name}) needs to be updated, will remove and reinstall."
    /usr/sbin/lpadmin -x "$name"
fi

# Install the printer.
/usr/sbin/lpadmin -p "$name" -L "$location" -D "$display_name" -v "${protocol}"://"${address}" -P "$driver_ppd" -E -o landscape -o printer-is-shared=false -o printer-error-policy=abort-job -o "$option_1" -o "$option_2" -o "$option_3"

# Create/update a receipt for the printer.
/bin/mkdir -p /private/etc/cups/deployment/receipts
/usr/libexec/PlistBuddy -c "Add :version string" "/private/etc/cups/deployment/receipts/${name}.plist" 2> /dev/null || true
/usr/libexec/PlistBuddy -c "Set :version $current_version" "/private/etc/cups/deployment/receipts/${name}.plist"

# Permission the directories properly.
/usr/sbin/chown -R root:_lp /private/etc/cups/deployment
/bin/chmod 755 /private/etc/cups/deployment
/bin/chmod 755 /private/etc/cups/deployment/receipts

exit 0

6) Copy and paste in your personalised Conditions Script.

#### Conditions Script ####

# Script is based off of nopkg code written by Walter Meyer and Nick McSpadden in the early days of Munki. Rewritten in 2019 by Michael Page for use with Addigy.

### Printer Variables ###
current_version="1.0.0"
display_name="Leo (Year 7)"

### Nothing below this line needs to change. ###

# Function to convert dot separated version numbers into an integer for comparison purposes.
# Examples: "2.1.0" -> 2001000, "52.14.7" -> 52014007.
function version {
    echo "$@" | /usr/bin/awk -F. '{ printf("%d%03d%03d\n", $1,$2,$3); }';
}

# Set name to be lowercased display_name with only alphanumeric characters.
name=$(echo "$display_name" | /usr/bin/tr -dc '[:alnum:]' | /usr/bin/tr '[:upper:]' '[:lower:]')

# Determine if the printer was previously installed.
if [ -f "/private/etc/cups/deployment/receipts/${name}.plist" ]; then
    # Get the script version number that was used to install the printer.
    installed_version=$(/usr/libexec/PlistBuddy -c "Print :version" "/private/etc/cups/deployment/receipts/${name}.plist")
    echo "Previously installed version of ${name}: $installed_version"
else
    echo "Printer ${name} was not previously installed."
    installed_version="0"
fi

# If a matching print queue with that name already exists.
if /usr/bin/lpstat -p "$name"; then
    # If the installed printer version is equal (or somehow newer) to the printer version in this script.
    if [ "$(version "$installed_version")" -ge "$(version "$current_version")" ]; then
        # The printer installed is the current or newer version, no need to reinstall it.
        echo "The installed printer (${name}) is already up-to-date, no need to reinstall."
        exit 1
    fi
fi

# Printer configuration is outdated or missing, trigger install printer.
exit 0

7) Copy and paste in your personalised Remove Script.

#### Remove Script ####

# Script is based off of nopkg code written by Walter Meyer and Nick McSpadden in the early days of Munki. Rewritten in 2019 by Michael Page for use with Addigy.

### Printer Variables ###
display_name="Leo (Year 7)"

### Nothing below this line needs to change. ###

# Set name to be lowercased display_name with only alphanumeric characters.
name=$(echo "$display_name" | /usr/bin/tr -dc '[:alnum:]' | /usr/bin/tr '[:upper:]' '[:lower:]')

# Remove printer from system.
/usr/sbin/lpadmin -x "$name"

# Remove associated printer install receipt.
/bin/rm -f "/private/etc/cups/deployment/receipts/${name}.plist"

8) Click SAVE CHANGES > REVIEW CHANGES > CONFIRM CHANGES.

9) Go to Policies > select the relevant organisation > Software > Click Add App to add the printer to the policy and optionally enable Self Service. Tip: always deploy to a test group first.

10) Lastly Deploy Changes and test!

Additional Tips

  • Any required printer drivers should be installed beforehand, however the order is not critical as the installation script first checks if the PPD (driver) is on disk before attempting to add the printer.

  • To deploy an alteration for a printer go to Policies > Catalog > Custom Software > click the name of the printer (not Edit) > New Version > increment the version number > Add Version > follow the steps above, skipping steps 2 and 3.

  • Printers are removed shortly after a Mac is removed from an Addigy policy.

  • Not working? Start a GoLive session with a Mac > click the Deployments tab > Custom Software > Deploy the printer to see where it is failing. Often the printer will not install if the referenced PPD path is incorrect or the printer driver has yet to be installed.

Comment

How to Transfer an AUSkey Between Macs

1 Comment

How to Transfer an AUSkey Between Macs

Current documentation on moving/copying an AUSkey between Macs is scarce, below are recent steps taken for a successful AUSkey migration.

  1. On the new Mac download and install the AUSkey Chrome & Firefox plugin from the Australian Business Register.

  2. On both Macs, open Finder > click Go in top menu bar > hold down an option key and select Library from the menu.

  3. Copy the following two directories from the old Mac to the same place on the new Mac:

  • ~/Library/AUSkey

  • ~/Library/Application Support/AUSkey

Note: AUSkey no longer requires Java to be installed.
1 Comment

Backing Up Your Mac

Comment

Backing Up Your Mac

Ever accidentally deleted an important file, experienced a drive failure or discovered computers don't drink coffee? Reliable backups protect you from losing your irreplaceable data. Today's blog post is an unbiased overview of all the popular backup options available to Mac users.

Syncing Services & "The Cloud"

It is important to point out that many syncing services (e.g. Dropbox, Resilio Sync, etc.) can also be configured to act as somewhat of a backup. Since that is not their intended use I have not included them in this overview.

Several of the backup solutions below store data with the vendor (cloud backup). As security breaches have become common place, trusting vendors and their ability to protect user data has never been more challenging. For this reason many vendors allow advanced users to take ownership of the encryption key, preventing anyone but the user from accessing the data.


Time Machine Logo.jpg
 

Time Machine is built into macOS making it very easy to back up your Mac.

Key Points

  • Unlike most alternatives, Time Machine includes both system files and user data.
  • Supports multiple backup destinations, allowing for geographically separated backup drives (e.g. one at work and one at home).
  • Compatible with Migration Assistant making the process of restoring data to a new Mac easy.
  • Theoretically supports backing up to network shares (e.g. AirPort Time Capsule, server or NAS), in practice I have found it unreliable.
  • Support for Power Nap, allowing backups to occur while the Mac is asleep.

Data Retention

  • Hourly backups for the past 24 hours.
  • Daily backups for the past month.
  • Weekly backups for all previous months.
  • The oldest backups are deleted when the backup disk becomes full.

User Experience

Setup

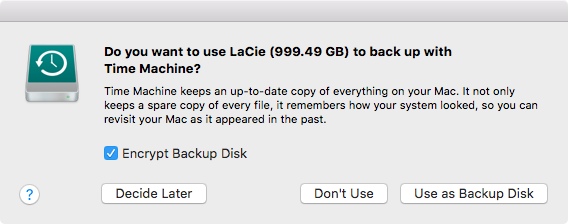
To start using Time Machine simply purchase an external hard drive (any brand), plug it into your Mac and click Use as Backup Disk. It is also advisable to select the Encrypt Backup Disk checkbox, preventing anyone from accessing your backup data without a password.

Time Machine Setup
 

After that backing up is as simple as plugging in a USB.

Restoring Data

    Enter Time Machine (Recommended)

    Open Launchpad > OtherTime Machine > On the right select the date you wish to go back to > Select the files you wish to recover and click Restore.


    Finder

    In Finder select the name of the backup disk in the sidebar > Backups.backupdb > COMPUTERNAME > Select the date you wish to go back to > Copy and paste the files you wish to restore.


    CrashPlan Logo
     

    Unfortunately, Code42 the creators of CrashPlan now only offer backup solutions for small business and enterprise markets. Although this is not for individuals, business owners would benefit from considering CrashPlan for their backup needs.

    Key Points

    • Support for all the major platforms (macOS, Windows and Linux).
    • By default only the user's home directory is backed up.
    • Australians back up to CrashPlan's Sydney data centre.
    • CrashPlan can also be configured to back up to a local disk.
    • CrashPlan for Small Business targets businesses with less than 200 employees.

    Data Retention

    Data retention is user configurable, backup storage with CrashPlan is unlimited and by default all user files are retained!

    CrashPlan Backup Schedule
     

    User Experience

    Setup

    1. Sign up for the free trial here.
    2. Download and install the CrashPlan app.
    3. Sign into the app and select a backup destination (e.g. CrashPlan PRO Australia).

    Restoring Data

    CrashPlan App (Recommend)

    Open CrashPlan app from the Launchpad > Click Get Files, select the date you wish to restore from and select files you wish to restore. By default, files are restored to the Downloads folder, but this can be set to the files original location or another directory.


    CrashPlan Web Restore

    Sign into the CrashPlan website > Select Devices > Active > Click the restore icon next to the relevant computer > Choose the date and the files you wish to restore.


    Backblaze Logo
     

    Backblaze is a cost effective cloud backup solution.

    Key Points

    • Supports both macOS and Windows.
    • Includes a Locate My Computer feature similar to Find My Mac.

    Data Retention

    • Unlimited storage.
    • Backblaze only keeps copies of files for 30 days after deletion.
    • External drives being backed up to Backblaze must be connected at least once every 30 days to avoid backup deletion.
    • If the computer running Backblaze does not connect to Backblaze's servers within 6 months all backup data is deleted.

    User Experience

    Setup

    1. Sign up for the free trial here.
    2. Download and install Backblaze.

    Restoring Data

    Restoring data is done through the Backblaze website. Customers have the option of downloading required files for free or ordering a USB drive to be mailed to them, at additional cost.


    Carbonite Logo
     

    Carbonite is a popular Windows cloud backup vendor, with support for macOS.

    Key Points

    • Supports both macOS and Windows.
    • The Mac application user interface layout feels somewhat unpolished compared to its competitors.

    Data Retention

    Just like Backblaze, Carbonite Safe Basic Backup files are only kept for 30 days after deletion.

    User Experience

    Setup

    1. Sign up for a free trial here.
    2. Download and install Carbonite.

    Restoring Data

    Carbonite App (Recommended)

    Click the Carbonite icon the menu bar and select Open Carbonite. Select the relevant location in the sidebar > select the deleted file or folder > click Get this back.


    Carbonite Website

    To restore files Carbonite recommend using their Mac app, however backed up files can be downloaded via their website. Simply sign in > click View files and select the files you wish to download.


    Acronis True Image 2018 Logo
     

    Acronis have been creating backup software for over 15 years and specialise in bare metal backups (similar to Time Machine & Carbon Copy Cloner).

    Data Retention

    Users are able to configure the number of versions archived.


    Key Points

    • Ability to backup to Acronis Cloud and/or a local disk.
    • All data including applications and system files are backed up by default.
    • An Acronis Cloud data centre is located in Sydney.
    • Acronis Cloud storage is not unlimited with storage options going all the way up to 5TB.

    User Experience

    Setup

    1. Download and install Acronis True Image 2018 from here.
    2. Open the application, create an account and set backup locations.

    Restoring Data

    Mac App

    Select the backup destination and then the Recovery tab > Select the backup version and browse for the files you wish to restore.

    Rescue Media

    Alternatively clicking the Recover Mac button in the app will create a bootable rescue USB. Once booted an entire system backup can be restored from a local disk, Acronis Cloud or network share.

    Acronis Online Dashboard

    Sign into the dashboard > Click RECOVER next to the relevant computer > Select the files you wish to download and click DOWNLOAD.


    Carbon Copy Cloner Logo
     

    At its core Carbon Copy Cloner (CCC) is a graphical user interface (GUI) for the handy command line tool rsync.

    Key Points

    • Makes the process of cloning all or part of a disk simple.
    • By default clones are bootable, include all system and user files and can be restored by Migration Assistant.
    • Is able to perform scheduled backups to external encrypted disks.
    • Support for backing up to network shares.

    Data Retention

    Although there is a SafetyNet feature that can be leveraged to recover modified/deleted files, CCC's primary purpose is to maintain a replica of an internal disk.

    User Experience

    Setup

    1. Download and install Carbon Copy Cloner from here.
    2. Set source (e.g. Macintosh HD), set a destination (e.g. an external hard drive) and set a schedule (e.g. hourly).

    Restoring Data

    • If the files are still present on the back up drive they can be copied directly in Finder.
    • In the event your computer's disk has been replaced or erased, Migration Assistant will happily restore data from a CCC backup.
    • In the event where files have been overwritten on the backup drive (APFS formatted) the SafetyNet feature may be able to restore modified/deleted files.

    Comment

    Flat Out of Time - Correcting the System Clock from the Login Window

    9 Comments

    Flat Out of Time - Correcting the System Clock from the Login Window

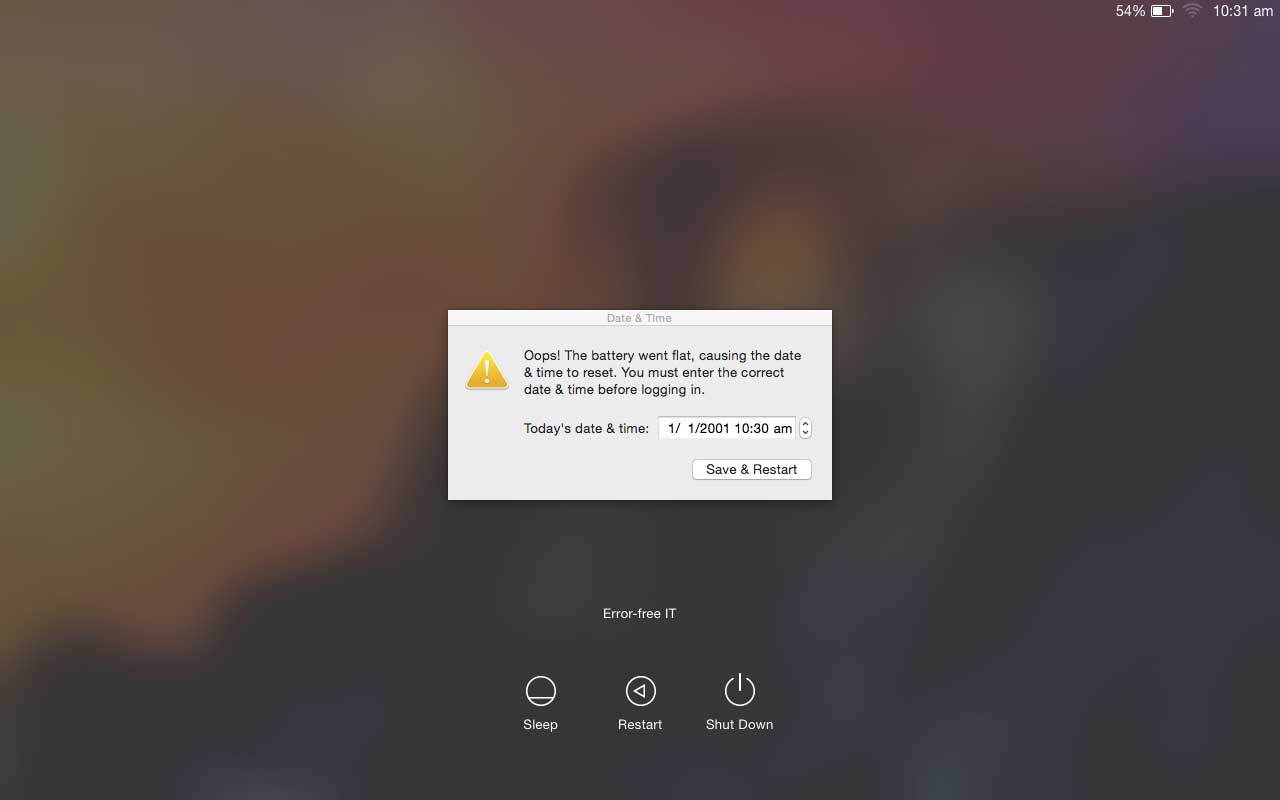
    Some of the schools I work with have shared class sets of MacBooks. Their shared MacBooks are configured to connect to the school’s Wi-Fi (WPA2 enterprise network) at the login window. Sometimes the MacBooks are left in sleep mode for extended periods of time, causing the battery to deplete and the system clock to reset.

    After the flat MacBooks are recharged and turned on, they fail to connect to Wi-Fi and this leads to users complaining that they cannot log in. This is due to the ‘Not Valid Before’ value of the Remote Authentication Dial-In User Service (RADIUS) certificate being ahead of the system clock.

    Correcting this issue would require a user to first realise the time is incorrect and then connect the MacBook to the network with an Ethernet cable or more commonly bring the MacBook to an IT Administrator with access to a local administrator account.

    With the number of users coming to see me with this issue, I started looking into ways I could give the user the ability to correct the system time themselves from the login window and without an Ethernet cable. My idea was to create an application that appears over the top of the login window if the system clock is set to a date before 2015.

    I found making an application visible at the login window surprisingly difficult. It wasn’t until I came across Apple’s PreLoginAgents sample code that I was a big step closer. Not long after that I had a working app that prompted users to correct the date and time after a flat battery.

    To use, simply download the package from here and deploy it to your clients.

    9 Comments

    Dock Master - A Superior Profile Maker for Managing the Dock

    410 Comments

    Dock Master - A Superior Profile Maker for Managing the Dock

    Recently I have been actively looking into the best solution for setting a custom dock on multiple machines.

    Apple’s Profile Manager allows the creation of configuration profiles with dock settings. However, the functionality has some frustrating limitations:

    • There is no control over the order in which applications are displayed in the dock.

    • You can only add applications to Profile Manager if they are installed (note: can be dummy .app files) on the OS X Server host itself.

    • No home directory relative path support, therefore you cannot simply add a user’s Downloads folder to the dock.

    The Search for Something Better

    I tried Kyle Crawford’s dockutil command line tool and found it worked well for changing the dock of existing local accounts, but required scripting (LaunchAgent) to apply to newly created accounts.

    I also had temperamental success in directly editing:
    /System/Library/CoreServices/Dock.app/Contents/Resources/en.lproj/default.plist
    /System/Library/CoreServices/Dock.app/Contents/Resources/com.apple.dockfixup.plist

    After that I tried using Tim Sutton’s mcxToProfile script to convert ~/Library/Preferences/com.apple.dock.plist into a profile. Unfortunately home directory relative folders were broken using this technique.

    Get To The Good Stuff

    Over the past week I started working on a tool to make generating dock configuration profiles easy and include all the features missing from other tools.

    The advantages of my solution (Dock Master) include:

    • Support for home directory relative paths (e.g. ~/Downloads).

    • The ability to include applications that are not installed.

    • Inclusion of network shares and website links with custom labels.

    • The ability to set folder attributes (sort by, display as and view content as).

    Dock Master is an intuitive way to customise and generate dock profiles. To help you get started I have included some sample data commonly featured in education docks and an example of a directory, share and website that can be edited/removed as required. Once all the desired alterations have been made the profile is ready to be downloaded and distributed.

    Removable Dock Items

    A few people have contacted me asking if there’s way to deploy a custom dock with removable items. Unfortunately, configuration profiles do not allow for this. Dock Master now works around this limitation by creating a dock preference file that is added to the User Template (new user accounts) and optionally replaces the dock plist in existing user accounts.

    Below you will notice a lock icon next to each dock item, unlocked items are removable by the end user. If one or more dock items are unlocked, Dock Master generates a tar file (compressed archive) instead of a configuration profile.

    Once the tar file (archive) is extracted you will have a folder containing a ‘makepackage.command’ script. To build your custom package, simply right click the script and select Open.

    The resulting package can be deployed just like any other package (e.g. Apple Remote Desktop, AutoDMG, DeployStudio, Munki, etc).

    Name


    Applications

    Please provide the full path to the application (.app file).

    Others (Folders/Shares/URLs/Weblocs)


    Additional Options

    Profile description:
    Profile scope:
    Prevent users from permanently modifying dock contents.
    Merge with user's existing/default dock.
    Add user's network home folder.
    Maximum icon size (1-256):
    Enable magnification. | Maximum magnification size (1-256):
    Dock position:
    Minimize windows using:
    Apps animate (bounce) on open.
    Automatically hide and show the dock.
    Show indicators for open applications.
    Minimise windows into app icon.
    Create package instead of profile. | Package applies to existing users. | Package version:
    Target macOS:

    Do You Like Dock Master?

    If you appreciate my work on Dock Master please consider making a donation. Dock Master has been a hobby project, I never developed it planning to make money (although my partner thinks I should) and I felt it was my way of contributing to the Mac Admin community. Donations help offset server hosting costs and access to resources.


    FAQ

    I have downloaded my fancy dock profile/package, how do I push it out to all my users?
    There are several ways to distribute profiles and packages, I recommend simply importing them straight into Munki.

    What happens if I want to change a Dock Master profile already installed on my clients?
    Dock Master profiles use the dock name as the profile identifier, therefore if you use the same name the new dock profile will overwrite the old. Dock Master packages simply overwrite any prior installed Dock Master package.

    Can I reorder dock items?
    Yes, simply click and drag the ≡ sign to change the position of a dock item.

    I still don’t get it, why would I use this?
    It's free!!!

    In education environments younger students find it difficult to find an application in Finder or the Launchpad, therefore having applications sitting in the dock allows students to independently access the applications they need.

    This tool allows advanced customisation and quick generation of dock profiles that can be applied to different device groups (e.g. Art, Music, Junior School Macs).

    And lastly because it's awesome!

    Where can I find the source code?

    I was surprised with the demand for Dock Master. Since its release I have rewritten Dock Master (originally PHP) into a native OS X Swift command-line tool for offline use. You can find the source code on GitHub here.

    410 Comments

    Creating a Never-booted OS X Standard Operating Environment (SOE) with AutoDMG

    1 Comment

    Creating a Never-booted OS X Standard Operating Environment (SOE) with AutoDMG

    In the past creating an OS X SOE image would involve performing a clean install of OS X, installing Applications, configuring any special settings, booting into single-user mode to remove any cache and machine specific files and lastly creating a restorable disk image.

    This process is time consuming, has many easy to forget steps and discourages image updating. Thankfully we now have AutoDMG, a user-friendly Mac application for creating never-booted OS X disk images.

    Instead of telling you how amazing it is you can try it yourself, it’s easy!

    Simply download the latest release of AutoDMG here.

    To make any use of AutoDMG you will also need a copy of the Install OS X Yosemite application. You can download the latest version of OS X Yosemite from the Mac App Store here.

    Open AutoDMG and drag and drop the Install OS X Yosemite application onto AutoDMG.

    AutoDMG can download and install the Apple software updates released post that version of the Install OS X Yosemite application. AutoDMG is also capable of installing additional custom packages.

    Click Build, select where you wish to save the image and wait.

    The resulting image can then be copied straight into a DeployStudio repository.


    Bonus Tips

    After a major OS X combo update is released you should delete and re-download the OS X installer from the Mac App Store, as they are also updated.

    In my experience packages containing preinstall and/or postinstall scripts are unreliable. The AutoDMG documentation here explains why that is. However, packages that simply copy files to a directory work reliably. If your package contains scripts, attempt a build and test the image. If it doesn’t work as expected consider repackaging it with AutoDMG friendly scripts, or simplify it down to a basic payload only package (copy various files to various directories).

    I recommend only including large package files in an SOE, leaving all other packages to your preferred software package management system (e.g. Munki, Casper, etc).

    1 Comment

    Installing & Automating AutoPkg with a Launch Daemon

    2 Comments

    Installing & Automating AutoPkg with a Launch Daemon

    UPDATE (1/12/15): Since AutoPkgr now supports recipe overrides I recommend using AutoPkgr over my headless script.


    AutoPkg is a great tool for downloading and packaging software for distribution. It also integrates nicely with Munki. After testing AutoPkg I looked into methods to further automate the updating process. I came across Sean Kaiser’s blog detailing how he created a script and triggered it using a launch daemon. I took his script as an example and began to build my own, with a few extra tweaks.

    My AutoPkg Wrapper triggers AutoPkg to run once daily at 8:30am, dynamically checking for updates to user recipe overrides and sending an email in the event of a new package.

    Without further ado I will walk you through setting up AutoPkg and automating it with my AutoPkg Wrapper.

    Note: If you haven’t already, it is important to install Munki and AutoPkg.


    Configuring AutoPkg

    First we need to add the main recipe repository to AutoPkg, we do this by opening Terminal and typing:

    autopkg repo-add http://github.com/autopkg/recipes.git

    Note: AutoPkg requires Git to be installed, if it is not installed you will be prompted to install it from Apple Software Update.

    Next we need to set the location of our Munki repository:

    defaults write com.github.autopkg MUNKI_REPO "/PATH/TO/MUNKI_REPO"

    AutoPkg uses recipe overrides to override default or unspecified recipe attributes. My Munki repositories follow a consistent naming convention and therefore I create recipe overrides for every AutoPkg recipe used. Below are the criteria for packages added to my Munki repositories:

    • Packages are placed directly into pkgs and not into subdirectories.
    • Packages are named in lowercase (e.g. Firefox.dmg > firefox.dmg).
    • Packages do not contain the developer’s name (e.g. googlechrome.dmg > chrome.dmg).
    • Packages are initially added to the development catalog.
    • The pkginfo display_name attribute is set to match the package name with proper case and spaces (e.g. flashplayer.dmg > Flash Player).
    • The unattended_installs pkginfo attribute is disabled.
    • The developer and category pkginfo attributes are set.


    Optionally you can download and install my collection of AutoPkg recipe overrides from GitHub:

    git clone https://github.com/Error-freeIT/AutoPkg-Recipe-Overrides.git ~/Library/AutoPkg/RecipeOverrides


    With AutoPkg configured let’s test a recipe:

    autopkg run -v AdobeFlashPlayer.munki

    Automating AutoPkg

    If that worked it’s time to automate AutoPkg, download and run the autopkgwrapper installer:

    git clone https://github.com/Error-freeIT/AutoPkg-Wrapper.git /tmp/autopkgwrapper && cd /tmp/autopkgwrapper && sudo ./install.sh

    The install script requires administrator privileges and therefore will prompt for a password, as it copies the script and launch daemon into place and opens the script in Nano for configuration.

    Update the ACCOUNT_NAME value to match the account name (a.k.a. username) containing the recipe overrides and update the EMAIL_FROM and EMAIL_TO addresses.

    Note: To save changes in the Nano text editor press control + X, type y and hit return.

    That’s it! Once set up you will be emailed when new items are added to the Munki repository. Standard workflow would then involve testing the new software and if the new software is stable, simply add it to your production catalog.


    Troubleshooting The AutoPkg Wrapper

    This AutoPkg Wrapper was intended to only be run as a launch daemon (by root) to manually run the AutoPkg Wrapper type:

    sudo "/Library/Scripts/AutoPkg Wrapper/autopkgwrapper.sh"

    You can update your email settings by typing:

    sudo nano "/Library/Scripts/AutoPkg Wrapper/autopkgwrapper.sh"

    By default the installed launch daemon is set to run daily at 8:30am, if you want to further customise how often the script is run I recommend editing the launch daemon with Lingon X.

    2 Comments

    Meet Munki - Managed Mac Software Deployment

    2 Comments

    Meet Munki - Managed Mac Software Deployment

    Recently I have come across a number of Mac schools and businesses running Munki, an open source software distribution tool. I have only studied it for a couple weeks but I can already see why so many Mac sites are using it. This post covers the concept of Munki, my best practices and a list of common commands.


    The Concept

    To put it simply, a Munki server maintains a repository of Mac software. Users running the Munki client application (a.k.a. Managed Software Update) are notified of new software and are then prompted to install it.

    Munki can deploy newer versions of currently installed applications (e.g. Google Chrome), Apple software updates (e.g. OS X 10.9.3 Combo) or even custom in-house packages (e.g. ConfigurePrinters.pkg). Munki can also detect if an application has been deleted and will reinstall it.


    The Structure

    A Munki repository is hosted on an internal web server and consists of four directories:

    pkgs: This contains all available software, generally as dmg, iso or pkg files.

    pkgsinfo: This contains a plist file for each software in the pkgs folder. It’s common to edit these plist files to add software to different catalogues, set software dependencies or edit the minimum OS requirements. The Munki server reads all the plists in pkgsinfo and compiles catalogues from the data. Clients do not access this directory.

    catalogs: This is another directory of plists. My Munki server has two catalogues: ‘development’ and ‘production.’ Catalogues are useful for sandboxing new versions of software until they are deemed ready for widespread deployment. Munki automatically generates a catalogue named ‘all’. This catalogue should not be included in any manifest.

    manifests: This directory contains more plist files, controlling which software is deployed to which clients as each client is set to download a specific manifest (e.g testing, staff_laptop, etc.). A manifest plist lists software (without versions) to install and/or remove. You can also add the optional_items key in a manifest plist and specify a list of optional software choices. This provides a self-service interface, allowing users to choose from the list of optional software.

    My Best Practices

    Naming Conventions
    To make maintaining the Munki repository more intuitive, I have taken a different approach to naming my catalogues and manifests that differs from norm found on the Munki wiki. I have chosen not to have a ‘testing’ catalogue, only ‘development’ and ‘production’ catalogues. I do however have a manifest called ‘testing’ that accesses the ‘development’ catalogue.

    Munki imports new .dmg files with the same filename. To keep the repository tidy, I recommend renaming files before importing. The filename should be in lowercase with no spaces, followed by a dash and the softwares version number (e.g. googlechrome-2.1.4.dmg).

    Granular Software Control
    In my previous workplace, every Mac ran a SOE (Standard Operating Environment) suite of software. Depending on the location (e.g. Art, Music, etc.) and user type (e.g. staff or student), specific extra software (e.g. Photoshop, Sibelius, etc.) was installed. On top of that there were faculty that required access to software normally only provided to Art or Music computer labs. Since Munki clients can only check a single manifest, I dealt with this limitation by creating a structure of manifests included in other manifests.

    It seems confusing at first, but once the infrastructure is set up, assigning new software to all relevant clients is simple. The green bubbles are manifests that clients check, we normally do not add any software directly to these. Yellow are purely for merging manifests, again nothing should be added to these. Blue are core attributes (e.g. laptop, staff, science, etc) software is assigned to these.

    For example; Skype is an application only installed on boarding house student machines. To add Skype to the boarders manifest I run:

    /usr/local/munki/manifestutil
    add-pkg Skype --manifest boarder

    The boarder’s MacBooks are configured to check the ‘student_laptop_boarder’ manifest and therefore are notified of any changes made to ‘soe,’ ‘student,’ ‘laptop’ and ‘boarder’ manifests.

    student_laptop_boarder.png

    Since Skype was added to the ‘boarder’ manifest, Managed Software Update lists Skype as well as VLC media player from the ‘soe’ manifest as available software.

    Please note: Manifests directly accessed by clients require a catalogue (e.g. ‘production’) to be specified, however, included manifests that are not directly accessed by clients do not require a catalogue to be set.


    Updating Software

    In this example I have two versions of Skype, 6.15 and 6.17 in my repository. Version 6.15 has already been tested and added to the ‘production’ catalogue, however, the newer version 6.17 still needs to be tested and was added to the ‘development’ catalogue on import. After thoroughly testing Skype version 6.17, I would simply edit the associated Skype-6.17.plist file in pkgsinfo, replacing 'development' with ‘production’ in the 'catalogs' section.

    To update the ‘production’ catalogue with this change I run:

    /usr/local/munki/makecatalogs

    The new version of Skype is now part of the ‘production’ catalogue and made available to clients.


    Common Commands

    Server Commands
    Display Munki server configuration:

    defaults read ~/Library/Preferences/com.googlecode.munki.munkiimport

    Import a new application or package:

    sudo /usr/local/munki/munkiimport /PATH/TO/SOFTWARE

    Rebuild catalogues from pkgsinfo data:

    /usr/local/munki/makecatalogs

    Enter manifest utility interactive mode:

    /usr/local/munki/manifestutil

    Common manifest utility interactive mode commands:

    list-manifests
    new-manifest MANIFESTNAME
    display-manifest MANIFESTNAME
    list-catalogs
    list-catalog-items CATALOGNAME
    add-catalog CATALOGNAME --manifest MANIFESTNAME
    add-pkg CATALOGITEM --manifest MANIFESTNAME


    Client Commands
    Set Munki software repo URL:

    sudo defaults write /Library/Preferences/ManagedInstalls SoftwareRepoURL "http://swupate.local/munki_repo"

    Set ClientIdentifier (manifest):

    sudo defaults write /Library/Preferences/ManagedInstalls ClientIdentifier "student_laptop_boarder"

    View client configuration:

    defaults read /Library/Preferences/ManagedInstalls

    Check for available updates from Terminal:

    sudo /usr/local/munki/managedsoftwareupdate 

    After checking for updates, install any discovered updates:

    sudo /usr/local/munki/managedsoftwareupdate —-installonly

    Download and install Apple software updates (does not require admin rights):

    sudo defaults write /Library/Preferences/ManagedInstalls InstallAppleSoftwareUpdates -bool true

    Show the user which software will be removed (managed uninstalls):

    sudo defaults write /Library/Preferences/ManagedInstalls ShowRemovalDetail -bool true
    

    Disable Munki installing software at the login window (useful for laptop users):

    sudo defaults write /Library/Preferences/ManagedInstalls SuppressAutoInstall -bool true

    Disable Munki installing software while user is logged in (useful for computer labs):

    sudo defaults write /Library/Preferences/ManagedInstalls SuppressUserNotification -bool true
    

    2 Comments

    The Ultimate Education/Enterprise Deployment Guide to Apple TV AirPlay Mirroring

    10 Comments

    The Ultimate Education/Enterprise Deployment Guide to Apple TV AirPlay Mirroring

    This guide was written primarily to benefit educational and corporate I.T. staff deploying Apple TVs in enterprise networks, however many of the tips can also be applied to home setups to greatly improve your AirPlay Mirroring experience.

    What is AirPlay Mirroring?

    AirPlay Mirroring, a feature in second and third generation Apple TVs, allows supported iPad, iPhone, iPod touch and Mac owners to wirelessly project their display to an audience. With recent updates, an Apple TV can even be used as a secondary display.

    When giving a presentation, think about the time spent mucking around with cables, inputs and resolutions. AirPlay Mirroring allows a presenter to instantly share a Keynote presentation directly from an iPhone while freely moving around the room. Once that presentation is over, the next presenter can instantly take control of the screen and start their presentation.

    AirPlay Mirroring takes advantage of the H.264 encoding functionality found in newer graphics cards. You can find Apple’s official list of supported AirPlay Mirroring Mac hardware here

    It is also worth mentioning AirParrot, a third party AirPlay Mirroring application for unsupported Macs and PCs. Just be aware that AirParrot relies heavily on CPU and as a result has a substantial impact on battery life.


    Network Infrastructure

    Wi-Fi Hardware

    AirPlay Mirroring is a highly bandwidth intensive, low latency technology. All of our previous wireless APs (access points) were wireless N specification and yet the AirPlay Mirroring experience with a class full of students was unreliable. Increasing the number of APs to balance wireless usage helped, but not to the standard we were after.

    After investigating various wireless vendors we made the move to Aerohive APs. It has greatly improved our AirPlay Mirroring experience and has allowed us to reduce our total number of APs. Now, each classroom containing an Apple TV also has an Aerohive AP330

    Special attention is required when positioning APs; for example, mounting an AP to a celling containing an air-conditioning duct may dramatically reduce the APs SNR (signal-to-noise ratio) and greatly impacts throughput. WiFi Explorer is a Mac application for tracking signal to noise ratio of APs. A good AirPlay Mirroring experience requires a SNR of at least 25dB. 


    Wi-Fi Configuration

    In 2011, connecting an Apple TV to a WPA2 Enterprise (802.11x) wireless network was unsuccessful. Therefore we created a WPA2 PSK network with a hidden SSID (not displayed on client devices) purely for Apple TVs. Please note that some time has passed since our initial tests and WPA2 Enterprise support has probably improved. Currently we have chosen to stick with WPA2 PSK as there is no need to install a WPA2 Enterprise profile with Apple Configurator and no real benefit.


    2.4GHz vs 5GHz

    Wireless N supports both the 2.4GHz and 5GHz radios. The 5GHz radio relies on line of sight, where as the the 2.4GHz signal penetrates through walls. During our initial rollout of Apple TVs, we found that they were connecting to the 2.4GHz radio coming from APs in other buildings instead of connecting to the 5GHz wireless access point in the same room.

    Since all of our wireless clients are iPads and Macs with 5GHz radio support, we were in a fortunate position to completely disable the 2.4GHz radio on our network and, as a result, Apple TVs connect to their closet access point. This has been a major component to delivering a smooth AirPlay Mirroring experience.


    Ethernet vs Wi-Fi

    Even with the best enterprise wireless equipment, Apple TVs still drop off of the network from time to time and simply require a reboot. Where possible, allocating a dedicated Ethernet port for your Apple TVs is by far the best option to improve reliability and performance.


    Apple TV Discovery

    Bonjour Discovery
    Both OS X and iOS use the Bonjour protocol to advertise and discover services on the network; this includes AirPlay. Bonjour is limited to only advertising to clients on the local subnet. This is a problem as enterprise networks generally separate clients into different subnets depending on their credentials (e.g. staff are segregated from students).

    A Bonjour gateway is the solution to this problem as it listens to Bonjour traffic on one subnet and then re-advertises on other subnets. We run Aerohive’s virtualised Bonjour gateway, however most wireless manufactures (e.g. Aruba, Cisco, Meru, Ruckus, Xirrus, etc.) now offer Bonjour gateways and experienced Linux administrators should take a look at Avahi.

    To get optimal performance from a Bonjour gateway, it is recommend to use a small subnet purely for Apple TVs, as Bonjour gateways scan smaller subnets much faster.

    Bluetooth Discovery
    With the release of Apple TV Update 6.1, third generation Apple TVs can now advertise themselves via Bluetooth. This is great for networks that don’t have a Bonjour gateway. Better yet, it means clients will only see a list of nearby AirPlay devices.


    Controlling Apple TV Updates

    Originally whenever Apple released a new Apple TV update I was filled with excitement followed by the dread of having to run around and manually update each of the eighty plus Apple TVs across the campus.

    To block Apple TV updates we assign our Apple TVs a DNS server (via DHCP) that contains DNS cache poisoning (resolves to 127.0.0.1) of the following URLs:

    • appldnld.apple.com
    • mesu.apple.com
    • appledld.com.edgesuite.net
    • itunes.apple.com.edgesuite.net

    It is also a good idea to point time.apple.com at your local NTP (Network Time Protocol) server.

    When we are ready to update all of our Apple TVs, we temporarily disable the DNS poisoning and all of the Apple TVs detect a new update. This used in conjunction with automatic updates is the best solution for enterprise networks with large numbers of Apple TVs.

    Another bonus to DNS poisoning is the removal of the movie banners and unnecessary services.

    The biggest issue we still battle with is the Apple TV updates which displays the ‘What’s New’ screen after it has updated as it prevents AirPlay until ‘Continue’ is selected with an Apple TV remote.


    Apple TV Configuration

    720p vs 1080p

    Setting third generation Apple TVs to output 720p video, greatly improves the AirPlay Mirroring experience. This is simply due to the client transmitting a 720p stream of their screen compared to a higher bandwidth intensive 1080p stream.


    AirPlay Security

    I am proud to be part of an I.T. team where delivering a great user experience always comes first and is not restricted with unnecessary policies. Due to the culture of our students, we provide open access to AirPlay Mirroring, therefore we do not make use of any AirPlay Mirroring security features. For the schools that are not in a position to do this, below are the available options for controlling AirPlay access.

    Static Password (Settings > AirPlay > Security > Password)
    With a static password, users are prompted to enter a password when they connect.

    Onscreen Code (Settings > AirPlay > Security > Onscreen Code)
    Selecting an Apple TV causes a randomised four digit code to be displayed on the selected Apple TV. The user is required to enter this code before AirPlaying.

    Network Access Control List
    In theory (untested), you could also use an ACL to limit access to the subnet containing your Apple TVs. Even if a device discovers an Apple TV via Bluetooth, if it cannot connect to the Apple TVs IP address, it will be unable to AirPlay.


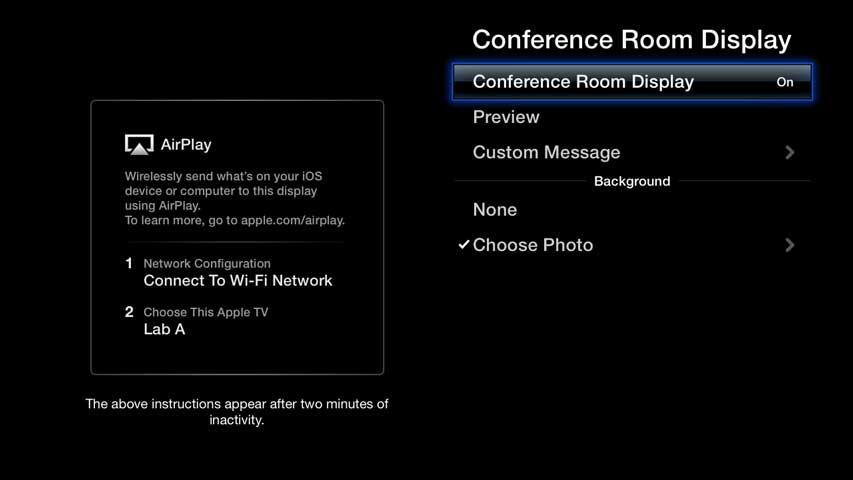
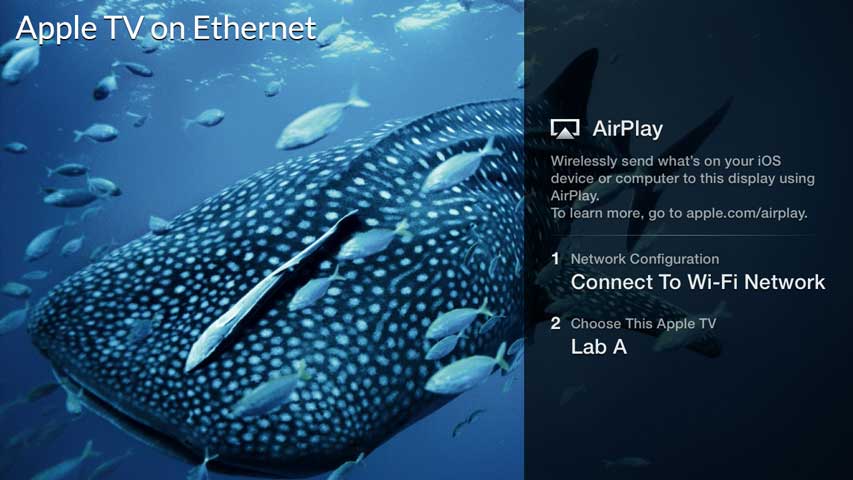
    Conference Room Display (Settings > AirPlay > Conference Room Display)

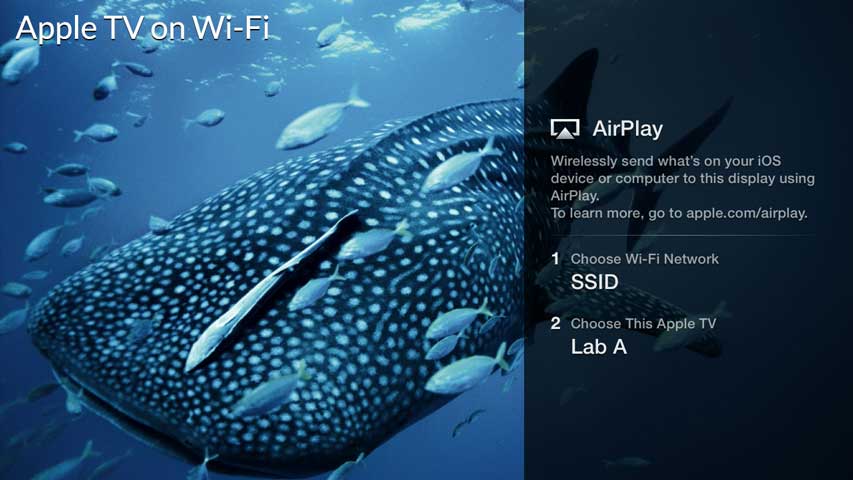
    The Apple TV 6.0 update introduced a Conference Room Mode; while idle instructions to AirPlay Mirror are displayed. This feature works great in situations where the Apple TV is connected via Ethernet or to the same wireless SSID as your clients. However, in our situation the hidden SSID we connect our Apple TVs to would be displayed. To avoid any confusion we do not use this feature.


    Out of the Box Configuration

    Below are the steps we take configuring a brand new Apple TV.

    1. Connect to the network via Ethernet or Wi-Fi.
    2. Name the Apple TV based on its physical location (Settings > General > Name > Custom).
    3. Physically label the Apple TV for easy identification.
    4. Disable sleep (Settings > General > Sleep After > Never)
    5. Disable screen saver (Settings > Screen Saver > Start After > Never)
    6. Set time zone (Settings > General > Time Zone > Manual)
    7. Enable automatic updates (Settings > General > Update Software > Update Automatically > On)
    8. Set resolution to 720p (Settings > Audio & Video > TV Resolution > 720p HD - 60Hz)


    Client Configuration and Training

    DVD Playback While AirPlay Mirroring


    For what is believed to be copyright reasons, the OS X DVD Player application will not allow playback of movies while AirPlay Mirroring. Our solution to this problem has been to use VLC for DVD playback. We have made the experience of inserting a DVD and having it play seamlessly with the following scripts:

    The bellow AppleScript ‘DVD.scpt’ opens VLC, detects the optical drive and then tells VLC to start playing the DVD.

    activate application "VLC"
    set drive to do shell script "mount | grep udf | awk '{ print $1 }'"

    tell application "VLC"
    OpenURL "dvdnav://" & drive
    play
    next
    end tell

    We then set DVD.scpt as the default action for DVDs, in System Preferences > CDs & DVDs.

    Manually configuring this setting through System Preferences on every Mac was not an option, so we pushed out the setting in the plist file:

    ~/Library/Preferences/com.apple.digihub.plist

    <?xml version="1.0" encoding="UTF-8"?>
    <!DOCTYPE plist PUBLIC "-//Apple//DTD PLIST 1.0//EN" "http://www.apple.com/DTDs/PropertyList-1.0.dtd">
    <plist version="1.0">
    <dict>
        <key>com.apple.digihub.dvd.video.appeared</key>
        <dict>
            <key>action</key>
            <integer>6</integer>
            <key>otherscript</key>
            <dict>
                    <key>_CFURLString</key>
                    <string>file:///Library/Scripts/AirPlay%20DVD/DVD.scpt</string>
                    <key>_CFURLStringType</key>
                    <integer>15</integer>
            </dict>
        </dict>
    </dict>
    </plist>


    Entering Passwords While AirPlay Mirroring

    If you have ever entered a password into an iOS device, you would have noticed the last character entered is displayed for a split second before it is masked. While AirPlay Mirroring from an iOS device, this behaviour still occurs and could allow others to work out your password.

    To combat this issue, users are taught to disconnect from AirPlay before entering passwords. Using iCloud Keychain is also encouraged as login credentials are pre-filled.
     

    Apple TV Alternatives

    Using an Apple TV for AirPlay Mirroring is the only Apple supported solution, but not the only AirPlay Mirroring solution out there, some schools run AirServer or Reflector. These solutions are worth considering if:

    • You don’t have the budget for a set of Apple TVs.
    • Your current displays do not support HDMI.
    • You already have dedicated computers connected to your projectors.
    • You want to record your AirPlay Mirroring into a video file.

    10 Comments