Standard Printer Deployment Limitations
The documented process for deploying printers with Addigy and other MDMs (reliant on configuration profiles) is simply not as good as printer deployment methods with Munki. Specific drawbacks with the MDM approach include:
No Printer Driver Detection
Configuration profiles do not check if the required printer driver (PPD) is available before adding a printer. If the driver is not present, the printer is still added but with a generic (feature limited) printer driver. Even if the driver is installed later on, the printer will not update to use the correct driver.
No Automated Printer Reinstall
Printers are only added during the install of a configuration profile. If a user removes a printer in System Preferences it is not automatically reinstalled, even though the printer configuration profile is still present.
No Automated Printer Removal
Removing the configuration profile that originally added the printer does not remove the printer. The printer still needs to be manually removed via System Preferences or a script.
Unable to Customise Printer Settings
Administrators often need to configure printer options such as single/double sided printing, A4/US Letter paper size, etc. Printer configuration profiles are yet to include these customisations.
Unable to Alter Printer Settings Over Time
Printers get replaced, networks change and finance departments decide grayscale printing should be the new default. The ability to push out new versions of the same printer with slightly different settings is useful.
Printer Sharing is Enabled
Printers are being added with the “Share this printer on the network” option enabled. I have yet to come across a situation where printer sharing was intentionally enabled, it should be disabled by default.
No Printers in Self Service
Unlike software, profiles cannot be added to Self Service. An issue for organisations that want staff to pick and choose printers.
Minor Gripes
Printers deployed with Addigy are added to CUPS with a generic printer name (e.g. mcx0, mcx1, etc).
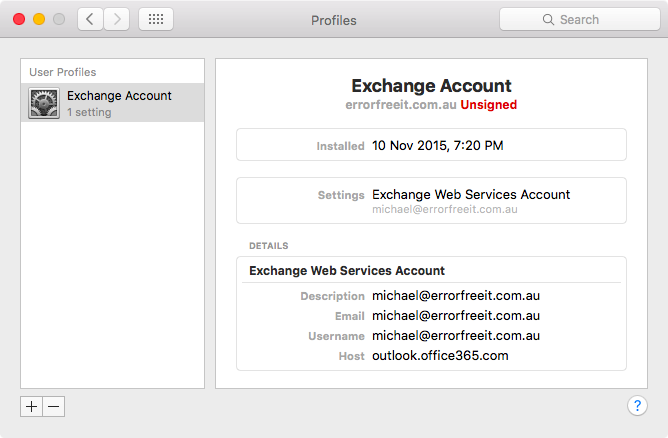
Printer profiles installed by Addigy are not signed.
Advanced Printer Deployment Method
The Munki nopkg (no package) method of deploying printers addresses all the issues listed above. I have rewritten the scripts to work with Addigy.
1) To personalise the scripts below please enter your printer details.
2) Log into Addigy go to Policies > Catalog > Custom Software > Add Software +
3) Enter a Software Identifier that includes the printer’s display name. The version number should also match the one provided above. Optionally, prefix the name with the target organisation’s initials/short name, for example: SCHL - Leo (Year 7).
4) Enter a brief description, set the category to Printers and set a custom icon, it will be displayed in Self Service.
5) Scroll past Upload Files and copy and paste in your personalised Installation Script.
# Script is based off of nopkg code written by Walter Meyer and Nick McSpadden in the early days of Munki. Rewritten in 2019 by Michael Page for use with Addigy.
### Printer Variables ###
# Variable current_version is useful for deploying printer alterations over time. The version should always match the Custom Software version in Addigy.
# Incrementation examples: 1.1.0 = Printer location description changed, 2.0.0 = Printer has been replaced with a newer model.
current_version="1.0.0"
# The printer name displayed to users, once printer has been deployed this should not change, as changing the name will result in duplicate printers.
display_name="Leo (Year 7)"
# Physical location of the printer.
location="Safari Building"
# Protocol used to connect to the printer (dnssd, lpd, ipp, ipps, http, socket).
protocol="lpd"
# Network address of the printer can be an IP address, hostname or DNS-SD address.
# DNS-SD address example: "HP%20LaserJet%20400%20colorMFP%20M475dn%20(626EDC)._ipp._tcp.local./?uuid=434e4438-4637-3934-3737-a45d36626edc"
address="10.118.227.10"
# Path to printer driver (PPD).
driver_ppd="/Library/Printers/PPDs/Contents/Resources/HP Color LaserJet Pro M252.gz"
# Specific options for the printer.
# To find available options, manually add the printer to a Mac and run: lpoptions -p "$insert_cups_printer_name_here" -l
# To list installed CUPS printer queue names run: lpstat -p | /usr/bin/awk '{print $2}'
option_1="PageSize=A4"
option_2="Duplex=None"
option_3=""
### Nothing below this line needs to change. ###
# Function to convert dot separated version numbers into an integer for comparison purposes.
# Examples: "2.1.0" -> 2001000, "52.14.7" -> 52014007.
function version {
echo "$@" | /usr/bin/awk -F. '{ printf("%d%03d%03d\n", $1,$2,$3); }';
}
# Set name to be lowercased display_name with only alphanumeric characters.
name=$(echo "$display_name" | /usr/bin/tr -dc '[:alnum:]' | /usr/bin/tr '[:upper:]' '[:lower:]')
# Ensure required printer driver is on disk.
/bin/ls "$driver_ppd"
# Determine if the printer was previously installed.
if [ -f "/private/etc/cups/deployment/receipts/${name}.plist" ]; then
# Get the script version number that was used to install the printer.
installed_version=$(/usr/libexec/PlistBuddy -c "Print :version" "/private/etc/cups/deployment/receipts/${name}.plist")
echo "Previously installed version of ${name}: $installed_version"
else
echo "Printer ${name} was not previously installed."
installed_version="0"
fi
# If a matching print queue with that name already exists.
if /usr/bin/lpstat -p "$name"; then
# If the installed printer version is equal (or somehow newer) to the printer version in this script.
if [ "$(version "$installed_version")" -ge "$(version "$current_version")" ]; then
# The printer installed is the current or newer version, no need to reinstall it.
echo "The installed printer (${name}) is already up-to-date, no need to reinstall."
exit 0
fi
# Printer installed is of a lesser version, therefore we will remove the outdated printer, ready for reinstall.
echo "The installed printer (${name}) needs to be updated, will remove and reinstall."
/usr/sbin/lpadmin -x "$name"
fi
# Install the printer.
/usr/sbin/lpadmin -p "$name" -L "$location" -D "$display_name" -v "${protocol}"://"${address}" -P "$driver_ppd" -E -o landscape -o printer-is-shared=false -o printer-error-policy=abort-job -o "$option_1" -o "$option_2" -o "$option_3"
# Create/update a receipt for the printer.
/bin/mkdir -p /private/etc/cups/deployment/receipts
/usr/libexec/PlistBuddy -c "Add :version string" "/private/etc/cups/deployment/receipts/${name}.plist" 2> /dev/null || true
/usr/libexec/PlistBuddy -c "Set :version $current_version" "/private/etc/cups/deployment/receipts/${name}.plist"
# Permission the directories properly.
/usr/sbin/chown -R root:_lp /private/etc/cups/deployment
/bin/chmod 755 /private/etc/cups/deployment
/bin/chmod 755 /private/etc/cups/deployment/receipts
exit 0
6) Copy and paste in your personalised Conditions Script.
# Script is based off of nopkg code written by Walter Meyer and Nick McSpadden in the early days of Munki. Rewritten in 2019 by Michael Page for use with Addigy.
### Printer Variables ###
current_version="1.0.0"
display_name="Leo (Year 7)"
### Nothing below this line needs to change. ###
# Function to convert dot separated version numbers into an integer for comparison purposes.
# Examples: "2.1.0" -> 2001000, "52.14.7" -> 52014007.
function version {
echo "$@" | /usr/bin/awk -F. '{ printf("%d%03d%03d\n", $1,$2,$3); }';
}
# Set name to be lowercased display_name with only alphanumeric characters.
name=$(echo "$display_name" | /usr/bin/tr -dc '[:alnum:]' | /usr/bin/tr '[:upper:]' '[:lower:]')
# Determine if the printer was previously installed.
if [ -f "/private/etc/cups/deployment/receipts/${name}.plist" ]; then
# Get the script version number that was used to install the printer.
installed_version=$(/usr/libexec/PlistBuddy -c "Print :version" "/private/etc/cups/deployment/receipts/${name}.plist")
echo "Previously installed version of ${name}: $installed_version"
else
echo "Printer ${name} was not previously installed."
installed_version="0"
fi
# If a matching print queue with that name already exists.
if /usr/bin/lpstat -p "$name"; then
# If the installed printer version is equal (or somehow newer) to the printer version in this script.
if [ "$(version "$installed_version")" -ge "$(version "$current_version")" ]; then
# The printer installed is the current or newer version, no need to reinstall it.
echo "The installed printer (${name}) is already up-to-date, no need to reinstall."
exit 1
fi
fi
# Printer configuration is outdated or missing, trigger install printer.
exit 0
7) Copy and paste in your personalised Remove Script.
# Script is based off of nopkg code written by Walter Meyer and Nick McSpadden in the early days of Munki. Rewritten in 2019 by Michael Page for use with Addigy.
### Printer Variables ###
display_name="Leo (Year 7)"
### Nothing below this line needs to change. ###
# Set name to be lowercased display_name with only alphanumeric characters.
name=$(echo "$display_name" | /usr/bin/tr -dc '[:alnum:]' | /usr/bin/tr '[:upper:]' '[:lower:]')
# Remove printer from system.
/usr/sbin/lpadmin -x "$name"
# Remove associated printer install receipt.
/bin/rm -f "/private/etc/cups/deployment/receipts/${name}.plist"
8) Click SAVE CHANGES > REVIEW CHANGES > CONFIRM CHANGES.
9) Go to Policies > select the relevant organisation > Software > Click Add App to add the printer to the policy and optionally enable Self Service. Tip: always deploy to a test group first.
10) Lastly Deploy Changes and test!
Additional Tips
Any required printer drivers should be installed beforehand, however the order is not critical as the installation script first checks if the PPD (driver) is on disk before attempting to add the printer.
To deploy an alteration for a printer go to Policies > Catalog > Custom Software > click the name of the printer (not Edit) > New Version > increment the version number > Add Version > follow the steps above, skipping steps 2 and 3.
Printers are removed shortly after a Mac is removed from an Addigy policy.
Not working? Start a GoLive session with a Mac > click the Deployments tab > Custom Software > Deploy the printer to see where it is failing. Often the printer will not install if the referenced PPD path is incorrect or the printer driver has yet to be installed.


