Viewing entries tagged
usb

Demystifying the Apple Lightning to USB 3 Camera Adapter

6 Comments

Demystifying the Apple Lightning to USB 3 Camera Adapter

A common question I get from travellers is, "how can I back up the photos taken with my digital camera without my laptop?"

The answer is to get an Apple Lightning to USB 3 Camera Adapter (MK0W2AM/A | model A1619) to use with your iPad/iPhone. This adapter works with any iPad or iPhone with a Lighting port, which covers almost every iPad/iPhone sold in the last 6 years.

Usage

  1. Simply connect your camera's USB cable into the adapter and plug the adapter into your iPad/iPhone.
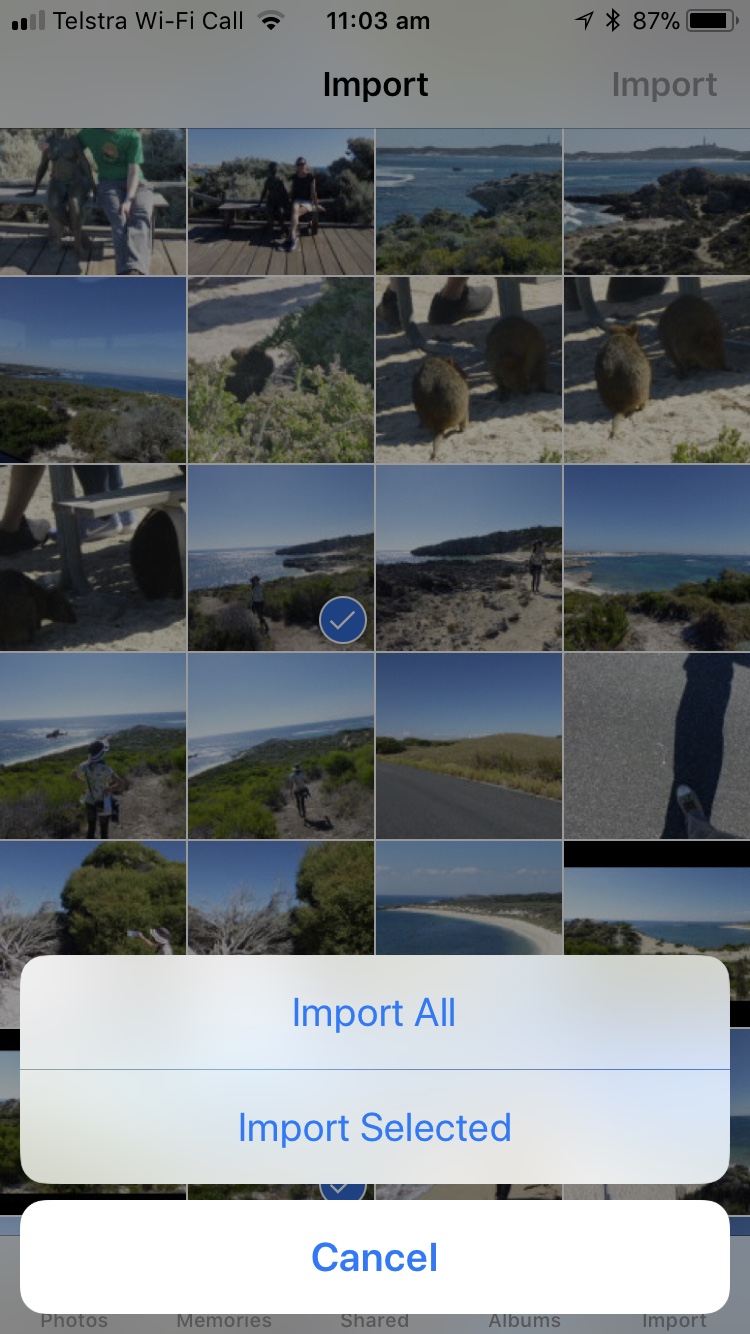
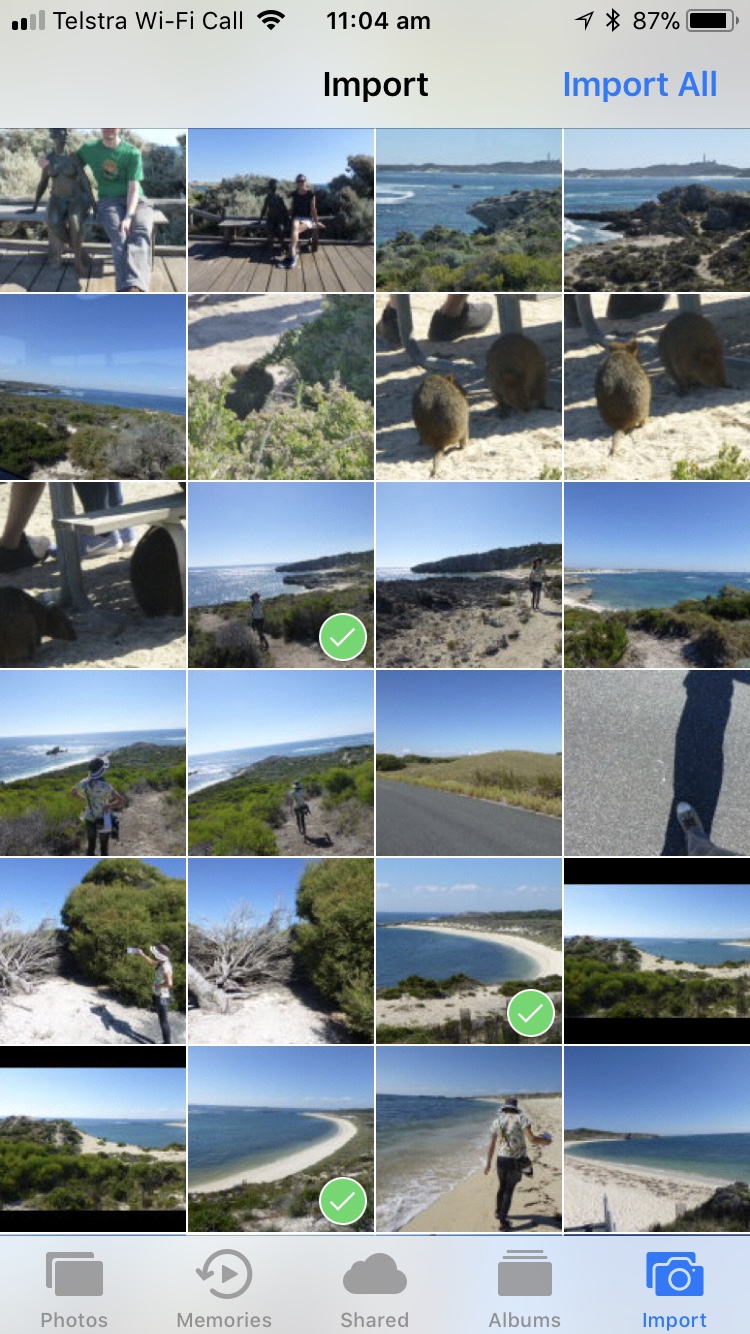
  2. The Photos app will automatically launch and allow you to import specific photos or import all.
  3. Imported photos will appear in the Last Import photo album.

Once imported, the next time your iPad/iPhone is connected to the Internet (e.g. hotel Wi-Fi), photos can be uploaded to your iCloud Photo Library.

The Photos app also remembers previously imported photos, so you don't need to worry about accidentally reimporting the same photos again.

Photos are not modified in any way and retain all metadata including date & time, location (cameras with GPS), camera settings used to take the photo and original filename.

Testing the adapter with a Panasonic Lumix DMC-TZ30, I found the Photos app fails to detect AVCHD formatted videos and therefore will not import them. Unless your camera records videos as MP4 files, importing videos will almost certainly require access to a computer.

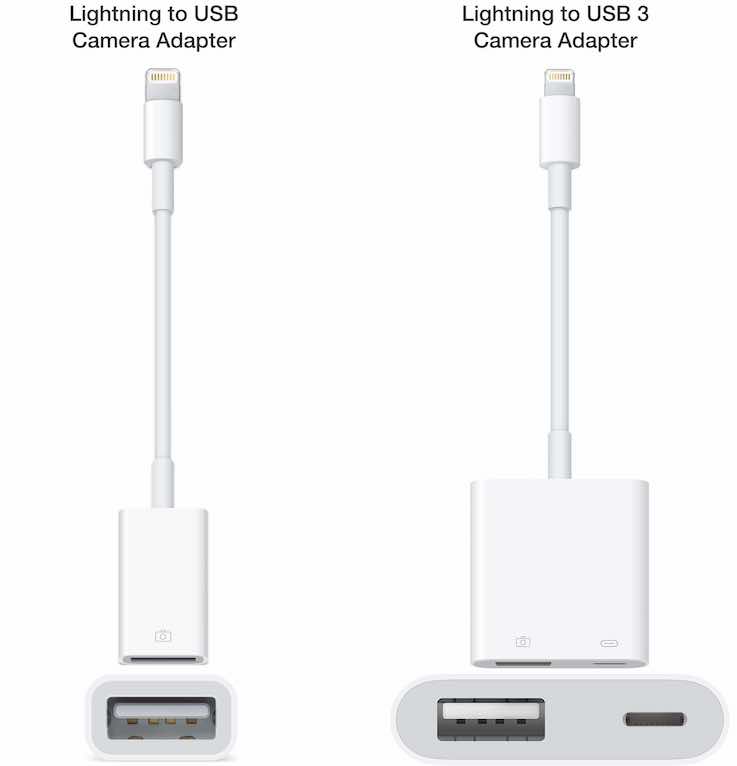
Lightning to USB Camera Adapters.jpg

The adapter is superior to the non-USB 3 Apple Lightning to USB Camera Adapter (MD821AM/A | model A1440).  Some digital cameras attempt to recharge when connected, the extra draw of power causes the iPad/iPhone error: "Cannot Use Device: The connected device requires too much power."

This error still occurs with the new adapter, however attaching a Lightning charger to the adapter resolves the error, allowing more cameras to work. If you are still getting the error: "Cannot Use Device: The connected device requires too much power." after connecting a charger, the charger is not outputting enough power for both the iPad/iPhone and the camera. Make sure you are using the charger that came with your iPad/iPhone.

Note: If you already own the older Lightning to USB Camera Adapter, connecting the adapter to an externally powered USB hub should also resolve the error.

Owners of the iPad Pro 10.5-inch and iPad Pro 12.9-inch will experience faster import speeds as the adapter performs at USB 3 speeds, compared to standard USB 2 speeds with other iPads and iPhones.

Surprisingly the adapter also works with many USB devices including:

  • keyboards: with support for screen brightness, volume and playback controls
  • barcode scanners: ideal for point-of-sale terminals
  • Ethernet adapters: ideal for fixed digital kiosks, Apple list supported models here.
  • hubs: connect multiple USB devices at once
  • memory card readers (e.g. microSD, MMC, etc.)
  • microphones: for higher quality audio recording
  • Musical Instrument Digital Interface devices (e.g. MIDI keyboards)

Note: The adapter does not provide access to storage apart from importing photos & videos.

6 Comments

Creating a Bootable OS X/macOS USB Installer

Comment

Creating a Bootable OS X/macOS USB Installer

Since the release of Mac OS X 10.6 (Snow Leopard) I've carried around a bootable USB on my keychain. It has made my life a lot easier reinstalling OS X/macOS without an Internet connection and troubleshooting Macs without a recovery partition. I also much prefer clean installs of the operating system, using this method vs updating from a previous version of OS X/macOS.

This post will go through the process I use to create a bootable OS X/macOS installer.


Requirements

  • At least an 8GB USB, you can also use a FireWire or Thunderbolt drive.

  • A Mac running 10.6.8 (Snow Leopard) or newer.

  • A fast Internet connection to download the OS X/macOS installer.


Step 1: Download OS X/macOS

If you haven’t already you can download the desired Install macOS application from the Mac App Store. Here are some direct links:

Once it's downloaded the installer automatically opens, simply quit it.

OSXMavericksInstaller.png
InstallOSXQuit.png

Step 2: Prepare the USB

We are about to erase everything on the USB, make sure you have copied off anything you wish to keep. 


Open Disk Utility (/Applications/Utilities/Disk Utility), select your USB drive from the list and click the ‘Erase’ tab.

Set format to: Mac OS Extended (Journaled)

Set name to either: Mavericks, Yosemite, El Capitan, Sierra, High Sierra, Mojave, Catalina, Big Sur, Monterey

DiskUtility.png


Click ‘Erase...’ and 'Erase' again, then enter your password if required. 

Step 3: Copy over the files

Open Terminal  (/Applications/Utilities/Terminal) and paste the appropriate command.

For Mavericks (10.9):

sudo /Applications/Install\ OS\ X\ Mavericks.app/Contents/Resources/createinstallmedia --volume /Volumes/Mavericks --applicationpath /Applications/Install\ OS\ X\ Mavericks.app --nointeraction

For Yosemite (10.10):

sudo /Applications/Install\ OS\ X\ Yosemite.app/Contents/Resources/createinstallmedia --volume /Volumes/Yosemite --applicationpath /Applications/Install\ OS\ X\ Yosemite.app --nointeraction

For El Capitan (10.11):

sudo /Applications/Install\ OS\ X\ El\ Capitan.app/Contents/Resources/createinstallmedia --volume /Volumes/El\ Capitan --applicationpath /Applications/Install\ OS\ X\ El\ Capitan.app --nointeraction

For Sierra (10.12):

sudo /Applications/Install\ macOS\ Sierra.app/Contents/Resources/createinstallmedia --volume /Volumes/Sierra --applicationpath /Applications/Install\ macOS\ Sierra.app --nointeraction

For High Sierra (10.13):

sudo /Applications/Install\ macOS\ High\ Sierra.app/Contents/Resources/createinstallmedia --volume /Volumes/High\ Sierra --applicationpath /Applications/Install\ macOS\ High\ Sierra.app --nointeraction

 For Mojave (10.14):

sudo /Applications/Install\ macOS\ Mojave.app/Contents/Resources/createinstallmedia --volume /Volumes/Mojave --applicationpath /Applications/Install\ macOS\ Mojave.app --nointeraction --downloadassets

For Catalina (10.15):

sudo /Applications/Install\ macOS\ Catalina.app/Contents/Resources/createinstallmedia --volume /Volumes/Catalina --nointeraction --downloadassets

For Big Sur (11):

sudo /Applications/Install\ macOS\ Big\ Sur.app/Contents/Resources/createinstallmedia --volume /Volumes/Big\ Sur --nointeraction --downloadassets

For Monterey (12):

sudo /Applications/Install\ macOS\ Monterey.app/Contents/Resources/createinstallmedia --volume /Volumes/Monterey --nointeraction --downloadassets

Hit return, type in your password, then hit return again. Don’t worry if it looks like you are not typing anything, it's just Terminal hiding your password input for added security. Depending on your USB, the copy process takes approximately 20 minutes to finish.


That's it! You should now have a bootable OS X USB installer. Go test it out by plugging it into a Mac that is turned off, pressing the power button and then holding down the 'option' key.

I’d like to thank tywebb13  for sharing the above Terminal command on the MacRumors forums.


If you need any help feel free to leave a comment. 

Comment