In almost no time at all this post will have your Mac up and running as an Apache 2 web server with PHP support. It's great for those that want to set-up a local web development environment to code that quick web app idea.
I have tested the following steps on Mac OS X Lion (10.7), OS X Mountain Lion (10.8) and OS X Mavericks (10.9).
Step 1: Enable PHP in the Apache configuration file
Open Terminal (/Applications/Utilities/Terminal) and type:
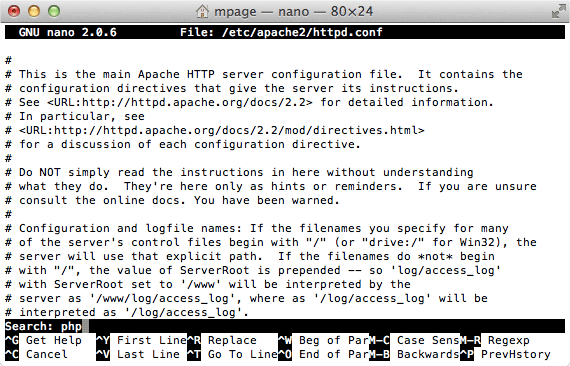
sudo nano /etc/apache2/httpd.conf
Hit return and type your password. Don’t worry if it looks like you are not typing anything, it's just Terminal hiding your password input for added security.
To search the document press control + w, type 'php' and hit return.
You'll need to uncomment (remove the leading #) the php5_module.
To save changes press control + x, type y and hit return.
Step 2: Start up Apache
Type:
sudo apachectl restart
Step 3: Test it out
Open Safari and type 'localhost' into the address bar. You should see:
This is the default web page that comes with Apache.
Open Finder and click 'Go' → 'Go to Folder…'
Type “/Library/WebServer/Documents/“ and click 'Go.'
Tip: You can press ‘tab’ to autocomplete folder names.
/Library/WebServer/Documents/
This index.html file is the “This works!” web page you saw in the last step. Go ahead and edit index.html in your favourite text editor. I like to use Coda 2 (bit pricey) for my web development projects, but you could use any text editor. Before Coda 2 I was using Smultron and Notepad++, which are much cheaper. Once you have made a change refresh the page in Safari to see your changes.


