Viewing entries tagged
os x

Backing Up Your Mac

Comment

Backing Up Your Mac

Ever accidentally deleted an important file, experienced a drive failure or discovered computers don't drink coffee? Reliable backups protect you from losing your irreplaceable data. Today's blog post is an unbiased overview of all the popular backup options available to Mac users.

Syncing Services & "The Cloud"

It is important to point out that many syncing services (e.g. Dropbox, Resilio Sync, etc.) can also be configured to act as somewhat of a backup. Since that is not their intended use I have not included them in this overview.

Several of the backup solutions below store data with the vendor (cloud backup). As security breaches have become common place, trusting vendors and their ability to protect user data has never been more challenging. For this reason many vendors allow advanced users to take ownership of the encryption key, preventing anyone but the user from accessing the data.


Time Machine Logo.jpg
 

Time Machine is built into macOS making it very easy to back up your Mac.

Key Points

  • Unlike most alternatives, Time Machine includes both system files and user data.
  • Supports multiple backup destinations, allowing for geographically separated backup drives (e.g. one at work and one at home).
  • Compatible with Migration Assistant making the process of restoring data to a new Mac easy.
  • Theoretically supports backing up to network shares (e.g. AirPort Time Capsule, server or NAS), in practice I have found it unreliable.
  • Support for Power Nap, allowing backups to occur while the Mac is asleep.

Data Retention

  • Hourly backups for the past 24 hours.
  • Daily backups for the past month.
  • Weekly backups for all previous months.
  • The oldest backups are deleted when the backup disk becomes full.

User Experience

Setup

To start using Time Machine simply purchase an external hard drive (any brand), plug it into your Mac and click Use as Backup Disk. It is also advisable to select the Encrypt Backup Disk checkbox, preventing anyone from accessing your backup data without a password.

Time Machine Setup
 

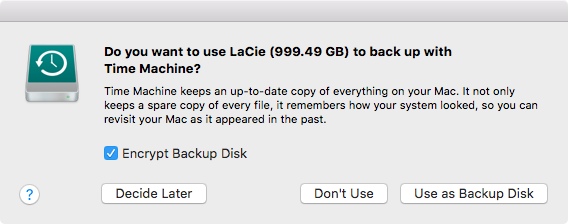
After that backing up is as simple as plugging in a USB.

Restoring Data

    Enter Time Machine (Recommended)

    Open Launchpad > OtherTime Machine > On the right select the date you wish to go back to > Select the files you wish to recover and click Restore.


    Finder

    In Finder select the name of the backup disk in the sidebar > Backups.backupdb > COMPUTERNAME > Select the date you wish to go back to > Copy and paste the files you wish to restore.


    CrashPlan Logo
     

    Unfortunately, Code42 the creators of CrashPlan now only offer backup solutions for small business and enterprise markets. Although this is not for individuals, business owners would benefit from considering CrashPlan for their backup needs.

    Key Points

    • Support for all the major platforms (macOS, Windows and Linux).
    • By default only the user's home directory is backed up.
    • Australians back up to CrashPlan's Sydney data centre.
    • CrashPlan can also be configured to back up to a local disk.
    • CrashPlan for Small Business targets businesses with less than 200 employees.

    Data Retention

    Data retention is user configurable, backup storage with CrashPlan is unlimited and by default all user files are retained!

    CrashPlan Backup Schedule
     

    User Experience

    Setup

    1. Sign up for the free trial here.
    2. Download and install the CrashPlan app.
    3. Sign into the app and select a backup destination (e.g. CrashPlan PRO Australia).

    Restoring Data

    CrashPlan App (Recommend)

    Open CrashPlan app from the Launchpad > Click Get Files, select the date you wish to restore from and select files you wish to restore. By default, files are restored to the Downloads folder, but this can be set to the files original location or another directory.


    CrashPlan Web Restore

    Sign into the CrashPlan website > Select Devices > Active > Click the restore icon next to the relevant computer > Choose the date and the files you wish to restore.


    Backblaze Logo
     

    Backblaze is a cost effective cloud backup solution.

    Key Points

    • Supports both macOS and Windows.
    • Includes a Locate My Computer feature similar to Find My Mac.

    Data Retention

    • Unlimited storage.
    • Backblaze only keeps copies of files for 30 days after deletion.
    • External drives being backed up to Backblaze must be connected at least once every 30 days to avoid backup deletion.
    • If the computer running Backblaze does not connect to Backblaze's servers within 6 months all backup data is deleted.

    User Experience

    Setup

    1. Sign up for the free trial here.
    2. Download and install Backblaze.

    Restoring Data

    Restoring data is done through the Backblaze website. Customers have the option of downloading required files for free or ordering a USB drive to be mailed to them, at additional cost.


    Carbonite Logo
     

    Carbonite is a popular Windows cloud backup vendor, with support for macOS.

    Key Points

    • Supports both macOS and Windows.
    • The Mac application user interface layout feels somewhat unpolished compared to its competitors.

    Data Retention

    Just like Backblaze, Carbonite Safe Basic Backup files are only kept for 30 days after deletion.

    User Experience

    Setup

    1. Sign up for a free trial here.
    2. Download and install Carbonite.

    Restoring Data

    Carbonite App (Recommended)

    Click the Carbonite icon the menu bar and select Open Carbonite. Select the relevant location in the sidebar > select the deleted file or folder > click Get this back.


    Carbonite Website

    To restore files Carbonite recommend using their Mac app, however backed up files can be downloaded via their website. Simply sign in > click View files and select the files you wish to download.


    Acronis True Image 2018 Logo
     

    Acronis have been creating backup software for over 15 years and specialise in bare metal backups (similar to Time Machine & Carbon Copy Cloner).

    Data Retention

    Users are able to configure the number of versions archived.


    Key Points

    • Ability to backup to Acronis Cloud and/or a local disk.
    • All data including applications and system files are backed up by default.
    • An Acronis Cloud data centre is located in Sydney.
    • Acronis Cloud storage is not unlimited with storage options going all the way up to 5TB.

    User Experience

    Setup

    1. Download and install Acronis True Image 2018 from here.
    2. Open the application, create an account and set backup locations.

    Restoring Data

    Mac App

    Select the backup destination and then the Recovery tab > Select the backup version and browse for the files you wish to restore.

    Rescue Media

    Alternatively clicking the Recover Mac button in the app will create a bootable rescue USB. Once booted an entire system backup can be restored from a local disk, Acronis Cloud or network share.

    Acronis Online Dashboard

    Sign into the dashboard > Click RECOVER next to the relevant computer > Select the files you wish to download and click DOWNLOAD.


    Carbon Copy Cloner Logo
     

    At its core Carbon Copy Cloner (CCC) is a graphical user interface (GUI) for the handy command line tool rsync.

    Key Points

    • Makes the process of cloning all or part of a disk simple.
    • By default clones are bootable, include all system and user files and can be restored by Migration Assistant.
    • Is able to perform scheduled backups to external encrypted disks.
    • Support for backing up to network shares.

    Data Retention

    Although there is a SafetyNet feature that can be leveraged to recover modified/deleted files, CCC's primary purpose is to maintain a replica of an internal disk.

    User Experience

    Setup

    1. Download and install Carbon Copy Cloner from here.
    2. Set source (e.g. Macintosh HD), set a destination (e.g. an external hard drive) and set a schedule (e.g. hourly).

    Restoring Data

    • If the files are still present on the back up drive they can be copied directly in Finder.
    • In the event your computer's disk has been replaced or erased, Migration Assistant will happily restore data from a CCC backup.
    • In the event where files have been overwritten on the backup drive (APFS formatted) the SafetyNet feature may be able to restore modified/deleted files.

    Comment

    Recovering a Forgotten OS X/macOS User Password

    2 Comments

    Recovering a Forgotten OS X/macOS User Password

    Recently I had an elderly client that could not remember the password to his iMac nor the email passwords configured in Apple Mail. I was caught in a situation where I could not reset his Keychain as that would remove his email passwords, but I also had no way of extracting passwords from his Keychain. On top of that I needed the password to install new printer drivers.

    This information is intended to support others that have forgotten their login password, it should not be used for evil. If you want to secure your system from vulnerabilities like this it is important to enable FileVault whole-disk encryption and use a unique/secure password. You can turn it on under System Preferences > Security & Privacy > FileVault.

    I remembered reading how the Automatic Login feature stores a cipher of the user's password in /etc/kcpassword. A quick Google search later and I had the following command to extract the password.

    Since the above command requires sudo and I didn't have access to an administrator account, I booted the iMac into Target Disk Mode, connected it to another Mac (via FireWire/Thunderbolt cable) and ran the following command:

    sudo ruby -e 'key = [125, 137, 82, 35, 210, 188, 221, 234, 163, 185, 31]; IO.read("/Volumes/Macintosh HD 1/etc/kcpassword").bytes.each_with_index { |b, i| break if key.include?(b); print [b ^ key[i % key.size]].pack("U*") }'

    And just like that I had recovered his password!

    2 Comments

    Automate the Setup of Microsoft Exchange Accounts on OS X

    2 Comments

    Automate the Setup of Microsoft Exchange Accounts on OS X

    I have been recently looking for the best way to automate the setup of Exchange accounts (specifically Office 365 hosted) on shared Macs. William Smith has created an impressive Exchange Setup AppleScript, perfect for Microsoft Outlook users.

    I also wanted to automate the setup of Exchange accounts for Apple’s native OS X apps (Mail, Contacts, Calendars, Reminders and Notes). Normally this would be done with a Mobile Device Management (MDM) solution, pushing out user personalised configuration profiles. But for those situations where a MDM isn’t feasible (possibly due to budget, resources, policy, etc.) or simply overkill this post should help you out. 

    To make life easier for those without a MDM I have put together a bash script to automate the setup of Exchange accounts on OS X.


    How it works

    The script locally generates and installs a user configuration profile (.mobileconfig file). To avoid the account being added as offline the user is also prompted for their Exchange account password.

    Usage

    I have tested this script on OS X El Capitan (10.11) with multiple Office 365 Exchange accounts.

    1. Install Joseph Chilcote's Outset script.
    2. Download the addexchangeaccount.sh script and customise the required DOMAIN and EXCHANGE_HOST values.
    3. Then copy the customised script into /usr/local/outset/login-once/ and remember to make it executable.

    That's it! The first time a user logs in they are prompted to enter their Exchange account password and then the script does the rest.

    2 Comments

    Flat Out of Time - Correcting the System Clock from the Login Window

    9 Comments

    Flat Out of Time - Correcting the System Clock from the Login Window

    Some of the schools I work with have shared class sets of MacBooks. Their shared MacBooks are configured to connect to the school’s Wi-Fi (WPA2 enterprise network) at the login window. Sometimes the MacBooks are left in sleep mode for extended periods of time, causing the battery to deplete and the system clock to reset.

    After the flat MacBooks are recharged and turned on, they fail to connect to Wi-Fi and this leads to users complaining that they cannot log in. This is due to the ‘Not Valid Before’ value of the Remote Authentication Dial-In User Service (RADIUS) certificate being ahead of the system clock.

    Correcting this issue would require a user to first realise the time is incorrect and then connect the MacBook to the network with an Ethernet cable or more commonly bring the MacBook to an IT Administrator with access to a local administrator account.

    With the number of users coming to see me with this issue, I started looking into ways I could give the user the ability to correct the system time themselves from the login window and without an Ethernet cable. My idea was to create an application that appears over the top of the login window if the system clock is set to a date before 2015.

    I found making an application visible at the login window surprisingly difficult. It wasn’t until I came across Apple’s PreLoginAgents sample code that I was a big step closer. Not long after that I had a working app that prompted users to correct the date and time after a flat battery.

    To use, simply download the package from here and deploy it to your clients.

    9 Comments

    Deploy Finder's Sidebar List Favorites

    2 Comments

    Deploy Finder's Sidebar List Favorites

    Recently I came across Matt Schalk's Change_Sidebar_list.py script for interacting with Finder’s sidebar list favorites.

    His script really caught my attention as I have come across situations where network home directories are missing the default set of Finder sidebar favorites.

    To easily deploy a standard set of Finder sidebar favorites I have created another script (setsidebarfavorites.sh) that interfaces with Matt’s Change_Sidebar_list.py script. This script was also created with Joseph Chilcote's outset in mind. Placing setsidebarfavorites.sh in /usr/local/outset/login-once/ will initially configure a user’s favorites and then leave it up to them to further customise.

    Usage

    1. Install changesidebarlist-1.0.pkg

    2. Install outset.pkg

    3. Install setsidebarfavorites-1.0.pkg


    customisation

    If you want to further customise the standard list of favorites included in setsidebarfavorites-1.0.pkg download and edit setsidebarfavorites.sh.

    Once customised simply copy setsidebarfavorites.sh into /usr/local/outset/login-once/ on your client machines and correct the script's file permissions with:

    sudo chown root:wheel /usr/local/outset && chmod -R 755 /usr/local/outset && xattr -rc /usr/local/outset

    2 Comments

    Dock Master - A Superior Profile Maker for Managing the Dock

    412 Comments

    Dock Master - A Superior Profile Maker for Managing the Dock

    Recently I have been actively looking into the best solution for setting a custom dock on multiple machines.

    Apple’s Profile Manager allows the creation of configuration profiles with dock settings. However, the functionality has some frustrating limitations:

    • There is no control over the order in which applications are displayed in the dock.

    • You can only add applications to Profile Manager if they are installed (note: can be dummy .app files) on the OS X Server host itself.

    • No home directory relative path support, therefore you cannot simply add a user’s Downloads folder to the dock.

    The Search for Something Better

    I tried Kyle Crawford’s dockutil command line tool and found it worked well for changing the dock of existing local accounts, but required scripting (LaunchAgent) to apply to newly created accounts.

    I also had temperamental success in directly editing:
    /System/Library/CoreServices/Dock.app/Contents/Resources/en.lproj/default.plist
    /System/Library/CoreServices/Dock.app/Contents/Resources/com.apple.dockfixup.plist

    After that I tried using Tim Sutton’s mcxToProfile script to convert ~/Library/Preferences/com.apple.dock.plist into a profile. Unfortunately home directory relative folders were broken using this technique.

    Get To The Good Stuff

    Over the past week I started working on a tool to make generating dock configuration profiles easy and include all the features missing from other tools.

    The advantages of my solution (Dock Master) include:

    • Support for home directory relative paths (e.g. ~/Downloads).

    • The ability to include applications that are not installed.

    • Inclusion of network shares and website links with custom labels.

    • The ability to set folder attributes (sort by, display as and view content as).

    Dock Master is an intuitive way to customise and generate dock profiles. To help you get started I have included some sample data commonly featured in education docks and an example of a directory, share and website that can be edited/removed as required. Once all the desired alterations have been made the profile is ready to be downloaded and distributed.

    Removable Dock Items

    A few people have contacted me asking if there’s way to deploy a custom dock with removable items. Unfortunately, configuration profiles do not allow for this. Dock Master now works around this limitation by creating a dock preference file that is added to the User Template (new user accounts) and optionally replaces the dock plist in existing user accounts.

    Below you will notice a lock icon next to each dock item, unlocked items are removable by the end user. If one or more dock items are unlocked, Dock Master generates a tar file (compressed archive) instead of a configuration profile.

    Once the tar file (archive) is extracted you will have a folder containing a ‘makepackage.command’ script. To build your custom package, simply right click the script and select Open.

    The resulting package can be deployed just like any other package (e.g. Apple Remote Desktop, AutoDMG, DeployStudio, Munki, etc).

    Name


    Applications

    Please provide the full path to the application (.app file).

    Others (Folders/Shares/URLs/Weblocs)


    Additional Options

    Profile description:
    Profile scope:
    Prevent users from permanently modifying dock contents.
    Merge with user's existing/default dock.
    Add user's network home folder.
    Maximum icon size (1-256):
    Enable magnification. | Maximum magnification size (1-256):
    Dock position:
    Minimize windows using:
    Apps animate (bounce) on open.
    Automatically hide and show the dock.
    Show indicators for open applications.
    Minimise windows into app icon.
    Create package instead of profile. | Package applies to existing users. | Package version:
    Target macOS:

    FAQ

    I have downloaded my fancy dock profile/package, how do I push it out to all my users?
    There are several ways to distribute profiles and packages, I recommend simply importing them straight into Munki.

    What happens if I want to change a Dock Master profile already installed on my clients?
    Dock Master profiles use the dock name as the profile identifier, therefore if you use the same name the new dock profile will overwrite the old. Dock Master packages simply overwrite any prior installed Dock Master package.

    Can I reorder dock items?
    Yes, simply click and drag the ≡ sign to change the position of a dock item.

    I still don’t get it, why would I use this?
    It's free!!!

    In education environments younger students find it difficult to find an application in Finder or the Launchpad, therefore having applications sitting in the dock allows students to independently access the applications they need.

    This tool allows advanced customisation and quick generation of dock profiles that can be applied to different device groups (e.g. Art, Music, Junior School Macs).

    And lastly because it's awesome!

    Where can I find the source code?

    I was surprised with the demand for Dock Master. Since its release I have rewritten Dock Master (originally PHP) into a native OS X Swift command-line tool for offline use. You can find the source code on GitHub here.

    412 Comments

    Munki Business - A Guide to Munki 2

    4 Comments

    Munki Business - A Guide to Munki 2

    A lot has changed since my original post on Munki 1, with Munki 2 well and truly out I have taken the opportunity to write an updated guide on Munki 2.

    What is Munki?

    Munki is a community driven project created by Greg Neagle, allowing IT Administrators to efficiently deploy software to large numbers of Macs.

    A Munki implementation can be broken down into two core parts;
    a) repository hosted on a web server
    b) bunch of clients running the Munki software
     

    A Munki Repository

    Since a Munki repository is simply a collection of organised files served out by a web server it can be hosted on any web server (e.g. IIS, Apache, etc.) regardless of platform. In the situation where the repository is hosted on a remote server, Administrators can remotely edit the repository over a network share.

    Every Munki repository is comprised of the following four directories:
    pkgs: All package (.pkg) and disk image (.dmg, .iso) files.

    pkgsinfo: For each piece of software in the pkgs directory there is an associated file in pkgsinfo. These files contain detailed information about that piece of software and the catalog(s) that software is assigned to. Conventionally these pkgsinfo files have the .plist extension.

    catalogs: Catalog files are generated from the contents of pkginfo files, they are used to separate production (tested) from development (untested) versions of software.

    manifests: Clients are configured to download a particular manifest file. These manifest files contain a list of software to install and the catalog (version) to use.

    Note: Apart from the contents of pkgs every other directory contains standard Extensible Markup Language (XML) files.

    With the release of Munki 2, there are three additional directories:
    artwork: A place to store any images used within software descriptions.

    client_resources: Home to the Managed Software Center application theme files.

    icons: Contains images (.png) used as software icons in the Managed Software Center application. The recommended icon resolution is 300x300.

    Setting Up a Repository

    The steps for setting up a Munki repository vary depending on web server and platform. For OS X the standard procedure involves creating a ‘munki_repo’ directory in ‘/Users/Shared/‘, populating it with the directories listed above. Then creating a symbolic link from ‘/Users/Shared/munki_repo’ to ‘/Library/Server/Web/Data/Sites/Default/’ and enabling the OS X Server web server.

    Managing Munki Repositories

    Download and install the latest release of Munki Tools here.

    Part of Munki Tools are the Munki Admin Tools for command-line management of Munki repositories. Unless you enjoy working purely in the command-line, I recommend downloading Hannes Juutilainen’s MunkiAdmin, a user-friendly application for managing Munki repositories. 

    Install AutoPkg

    AutoPkg automates the process of downloading and importing third party software updates straight into the Munki repository. Look at setting up AutoPkg by following my guide here.

    Manually Importing New Software

    If you wish to manually import a piece of software here are the steps:

    Before we can use the Munki Admin Tools we need to complete the initial setup. To start the setup open Terminal and type:

    munkiimport --configure

    The 'Repo fileshare URL' can be left blank if the Munki repository is stored on the local disk, otherwise provide a network share path (e.g. smb://SERVERADDRESS/munki_repo).

    I recommend following the guidelines below, to keep your Munki repository tidy:
    First rename the software you wish to import:

    • Match the name to the software (e.g. jre-7u67-macosx-x64.dmg > java.dmg).
    • Only use lowercase letters (e.g. Firefox 32.0.3.dmg > firefox.dmg).
    • Do not use dashes, underscores or spaces (e.g. Skype_6.19.0.452.dmg > skype.dmg).
    • Delete version numbers (e.g. vlc-2.1.5.dmg > vlc.dmg).
    • Omit the developer’s name (e.g. googlechrome.dmg > chrome.dmg).

    Once renamed open Terminal and type ‘munkiimport ‘ (take note of the trailing space).
    Drag the renamed package onto the Terminal window and hit return.
    When prompted for an item name enter the name of the package without the extension (e.g. firefox.dmg > firefox).
    The display name can contain spaces and capitals (e.g. Flash Player).
    The description can be left blank for now, as it can be added in later with MunkiAdmin.
    The version number is pulled from the software, verify it is accurate and hit return, otherwise type in the correct version number.
    When prompted for a category, use the Mac App Store categories as a guide (e.g. Productivity, Utilities, etc).
    Enter the developer’s name (e.g. Apple, Google, etc).
    When prompted for Catalogs hit return.
    You will be presented with a summary of your input, if you are happy that it is all correct type y and hit return.
    Just hit return when asked for a subdirectory path.
    Munki may offer to extract an icon, type y and hit return. 
    You are given a chance to make any alterations to the newly generated pkginfo file, simply press control + X.
    Lastly you are asked if you would like to rebuild catalogs, type y and hit return.

    Assigning Software to Manifests

    To put it simply manifests contain lists of software to install and the catalogs (software version) to use. Software can either be set as mandatory (managed_installs) or optional (optional_installs). Optional installs provide a self-service experience similar to the Mac App Store.

    MunkiAdmin makes the process of assigning software to manifests simple, just add a new item under either the Installs tab (mandatory) or the Optional Installs tab.

    As seen in the diagram below, every Mac installs a SOE (Standard Operating Environment) suite of software. Depending on the Mac’s location (e.g. Art, Music, etc.) and the intended user type (e.g. staff or student), additional software (e.g. Photoshop, Sibelius, etc.) is installed. Since Munki clients can only check a single manifest, I have dealt with this limitation by stacking manifests.

    It may seem confusing at first, but once the manifest infrastructure is in place, assigning new software to all relevant clients is simple. The green bubbles are manifests that clients check and we normally avoid adding any software directly to these. Yellow are purely for merging manifests, again nothing should be added to these. Blue are core attributes (e.g. laptop, staff, science, etc.) and software is assigned to these.

    Configuring Munki Clients

    Once Munki Tools is installed, clients need to be configured with the Munki repository's address and which manifest to check. Often these settings are configured using DeployStudio, a payload-free package or another means of script execution. This can be performed manually in Terminal with:

    defaults write /Library/Preferences/ManagedInstalls.plist SoftwareRepoURL http://SERVERADDRESS/munki_repo
    defaults write /Library/Preferences/ManagedInstalls.plist ClientIdentifier MANIFESTNAME

    Testing Software

    Before pushing out software to every Munki client it is important to thoroughly test that it works as expected. You should configure at least one test machine the same way as the rest of your client’s with the exception of pointing it to a testing manifest.

    A testing manifest should include both the development and production catalogs, as well as a manifest directly accessed by clients.

    Once that piece of software has been deemed stable, add it to the production catalog and watch as the rest of your clients install it.

    Frequently Asked Questions

    If you have read this far, you should be starting to get an understanding of how useful and feature rich Munki is. For readability I have chosen to tackle common queries I receive regarding Munki.

    How does Munki know what is already installed?
    Any applications installed by simply dragging and dropping them into Applications are detected by Munki. If a user deletes a drag and drop app from Applications Munki will notice its absence and reinstall it.

    With package files, Munki indirectly checks for the existence of receipt files, therefore deleting the associated .plist and .bom files of a package in /var/db/receipts will cause Munki to reinstall that package.

    Managed Software Center keeps attempting to install the same package over and over. What’s going wrong?
    If MSC loops on a package, compare the receipts listed in the pkginfo file to the receipts present in the '/var/db/receipts/' directory. Once you figure out the missing receipt(s) mark them as optional (ignored).

    You can also use Terminal’s ‘pkgutil’ command to search for installed receipts. In the example below I am searching for receipts containing the word xerox, the (?i) part ignores case and .* are wildcards.

    Can we customise the banners in Managed Software Center?
    Absolutely! You can even customise the sidebar and footer links. The official Munki wiki does a great job covering this in detail here.

    How frequently does Munki check for updates?
    After ten seconds of inactivity at the login window Munki will automatically install any locally cached updates.

    By default a launch daemon is set to run ‘/usr/local/munki/supervisor’ ten minutes past every hour. The supervisor generates a random delay of up to sixty minutes to help stagger clients contacting the Munki repository. Once the delay is over supervisor triggers ‘/usr/local/munki/managedsoftwareupdate’, if there are new updates the logged in user is notified by Managed Software Center.

    Note: Munki is also capable of installing software without any user intervention. This is achieved  by enabling 'Unattended install' in MunkiAdmin.

    Will Managed Software Center work outside of the organisation?
    As long as the web server hosting the Munki repository is externally accessible MSC will also work externally. If you plan on hosting a Munki repository on a public web server you should also configure SSL Client Certificates to ensure access to the repository is limited to permitted clients. 

    How can I remotely trigger Munki clients to check for updates?
    Using Apple Remote Desktop you can trigger groups of Macs to instantly check the Munki repository for updates and install.

    Trigger Munki instantly regardless of whether a user is logged in:

    /usr/local/munki/managedsoftwareupdate;/usr/local/munki/managedsoftwareupdate --installonly

    Trigger Munki to run the moment the current user logs out or if nobody is currently logged in:

    touch /Users/Shared/.com.googlecode.munki.checkandinstallatstartup

    Tip: You can save those commands as Unix command templates in ARD.

    How do I go about troubleshooting a Munki issue?
    Since the Munki repository is just a bunch of files served out by a web server, almost all troubleshooting is performed from Munki clients.

    On a client open Terminal and run:

    sudo managedsoftwareupdate

    This will immediately display any issues with the repository. You can also check the client log files stored in ‘/Library/Managed Installs/Logs/‘.

    How do we update the version of Munki Tools running on clients?
    AutoPkg makes it easy to keep your Munki clients up-to-date with frequently updated software (e.g. Flash Player, Java, etc.). You can quickly set up AutoPkg by following my guide here. There is a munkitools2.munki.recipe override included in my collection of recipe overrides. This will automatically import the latest release of Munki Tools into your Munki repository, as four separate packages:
    munkitools_core.pkg: The required core command-line tools used by Munki.
    munkitools_admin.pkg: The optional admin command-line tools for managing Munki repositories.
    munkitools_app.pkg: The user-friendly Managed Software Center application.
    munkitools_launchd.pkg: The launchd items to automate checking for updates.

    The only package that should be assigned to a manifest is the munkitools_app, the rest are either marked as ‘required’ or ‘update for’ packages that would be installed regardless.

    4 Comments

    Separating System and User Data with DeployStudio

    2 Comments

    Separating System and User Data with DeployStudio

    Some end-users seem to find new ways to mess-up their computers, instead of spending a lengthy time trying to undo the damage, IT Staff can simply reimage a Mac with DeployStudio.

    Placing the operating system (OS X & Applications) and user data (home directories) on separate partitions makes the process of restoring/upgrading the operating system even faster as there is no longer a need to migrate user data. 

    Below I have listed the steps to configure DeployStudio to set up Macs with separate partitions for operating system and user data.

    Setup

    In DeployStudio create a new workflow titled ‘Partition’. The first item to add is a safeguard Alert task, followed by a Partition task. Allocate 80 GB to ‘System’ and the remaining space to the ‘Data’ partition. Also set ‘Target volume’ to ‘First disk available.’

    Now edit your existing Reimage workflow. Before your ‘Restore’ task add a ‘Workflow’ task and set ‘Embed workflow’ to ‘Returned by script…’ and the script to ‘check_partitions.sh’. The check_partitions.sh script can be downloaded from here.

    The check_partitions.sh script:

    • Skips partitioning if the System and Data partitions already exist.
    • Partitions the disk if neither System or Data partitions are found.
    • Aborts the DeployStudio workflow if only one of the partitions are found.

    Under your ‘Restore’ task set the ‘Target volume’ to ‘System’ and ‘Rename volume’ to ‘System’.

    After the ‘Restore’ task add a ‘Generic’ task, set the command to ‘redirect_users.sh’, check ‘Postponed execution’ and ‘Automate.’ The redirect_users.sh script can be downloaded from here.

    The redirect_users.sh script:

    1. Removes the standard Users directory from the System partition. 
    2. Creates a symbolic link pointing Users to /Volumes/Data/Users.
    3. Recreates the /Users/Shared directory on the Data partition.


    That’s it, happy reimaging!


    Additional Information

    Size Restriction
    Unlike the standard single Macintosh HD partition layout, users are limited by the size of the Data partition. This can be an issue for small (<128 GB) MacBook Air SSDs. If your Macs are low on storage I recommend taking a look at this DeployStudio guide.

    Always Backup
    Although reimaging a machine with the above set up should not affect the Data partition you should always ensure your user has an up-to-date backup (e.g. Time Machine) beforehand.

    No FileVault Support
    Working mainly in school environments there has never been a demand for encrypting user data. Feedback from MacEnterprise.org members has brought to my attention that FileVault only encrypts the OS X partition (System) and not the Data partition. If you plan on using FileVault the only option is to keep everything on a single partition.

    Missing Finder Icons
    If a home directory path contains a symbolic link there is a bug in Finder where the pretty sidebar/home folder icons are missing. This issue occurs because we are using a symbolic link to redirect the Users directory.

    To correct this issue OS X needs to be updated with the actual path to the user’s home directory. This can be done in System Preferences > Users & Groups, unlock the preferences and right click your user account > Advanced Options and update ‘Home directory,’ with the actual path (e.g. /Volumes/Data/Users/mpage).

    This can also be achieved in Terminal with the ‘dscl' command by updating a user’s ‘NFSHomeDirectory’ attribute.

    To automate this for school environments I have created a LaunchDaemon script, set to run on startup. This script updates all local user accounts with their actual home directory paths. You can download the script from here.

    2 Comments

    Creating a Never-booted OS X Standard Operating Environment (SOE) with AutoDMG

    1 Comment

    Creating a Never-booted OS X Standard Operating Environment (SOE) with AutoDMG

    In the past creating an OS X SOE image would involve performing a clean install of OS X, installing Applications, configuring any special settings, booting into single-user mode to remove any cache and machine specific files and lastly creating a restorable disk image.

    This process is time consuming, has many easy to forget steps and discourages image updating. Thankfully we now have AutoDMG, a user-friendly Mac application for creating never-booted OS X disk images.

    Instead of telling you how amazing it is you can try it yourself, it’s easy!

    Simply download the latest release of AutoDMG here.

    To make any use of AutoDMG you will also need a copy of the Install OS X Yosemite application. You can download the latest version of OS X Yosemite from the Mac App Store here.

    Open AutoDMG and drag and drop the Install OS X Yosemite application onto AutoDMG.

    AutoDMG can download and install the Apple software updates released post that version of the Install OS X Yosemite application. AutoDMG is also capable of installing additional custom packages.

    Click Build, select where you wish to save the image and wait.

    The resulting image can then be copied straight into a DeployStudio repository.


    Bonus Tips

    After a major OS X combo update is released you should delete and re-download the OS X installer from the Mac App Store, as they are also updated.

    In my experience packages containing preinstall and/or postinstall scripts are unreliable. The AutoDMG documentation here explains why that is. However, packages that simply copy files to a directory work reliably. If your package contains scripts, attempt a build and test the image. If it doesn’t work as expected consider repackaging it with AutoDMG friendly scripts, or simplify it down to a basic payload only package (copy various files to various directories).

    I recommend only including large package files in an SOE, leaving all other packages to your preferred software package management system (e.g. Munki, Casper, etc).

    1 Comment

    Capturing Package Files with PkgKeeper

    3 Comments

    Capturing Package Files with PkgKeeper

    Deploying software via Munki is an excellent asset to sites managing fleets of Macs. Sometimes however, a package will not be listed directly on Apple's Support website and also may not be taking advantage of OS X Server's Caching Service. This is why I created the script PkgKeeper. The script works by monitoring filesystem access and if a pkg or dmg file is detected a hard link of the file is created on the user’s desktop.

    At this point you may be asking yourself “what is a hard link?” Every unique file on a Unix (the foundation of OS X) filesystem has an inode (index node). One of the attributes of an inode is ‘link count.’ The link count is the number of hard links to a file.

    Normally a file has a link count of just one, but when a new hard link is created that link count is incremented by one. Naturally, removing a file decrements the link count by one. It is not until the link count reaches zero that the inode is removed and the space is marked as available for use.

    Under normal circumstances once an update package is installed and the package is removed the file's link count goes from one to zero. However, PkgKeeper creates another hard link of the file while it is still in use setting the file's link count to two. This stops the file from hitting a link count of zero and being completely removed.


    Using The Script

    Open Terminal and paste the following to download the script:

    curl -O https://raw.githubusercontent.com/Error-freeIT/PkgKeeper/master/pkgkeeper.sh

    Make the script executable:

    chmod +x pkgkeeper.sh

    Run the script:

    sudo ./pkgkeeper.sh

    Start downloading an update and watch as the script captures the package file.

    Note for OS X 10.11 users: El Capitan's System Integrity Protection prevents this script from working. To temporally disable SIP boot into a recovery partition or 10.11 USB installer, open Terminal and type 'csrutil enable --without dtrace'.

    Bonus Tips

    In Terminal you can view a file's link count with the command:

    stat -f '%l' FILE_NAME

    The inode also contains the User ID, Group ID and file mode attributes of the file. Therefore all hard links will have the same user, group ownership and access permissions.

    Once the update is installed the original process deletes its hard link to the file. This means it is no longer accessing the file and we are safe to edit the file's ownership. The easiest way to do this is by editing the 'Sharing & Permissions' section in the 'Get Info' window.

    3 Comments