Viewing entries tagged
script

Automate the Setup of Microsoft Exchange Accounts on OS X

2 Comments

Automate the Setup of Microsoft Exchange Accounts on OS X

I have been recently looking for the best way to automate the setup of Exchange accounts (specifically Office 365 hosted) on shared Macs. William Smith has created an impressive Exchange Setup AppleScript, perfect for Microsoft Outlook users.

I also wanted to automate the setup of Exchange accounts for Apple’s native OS X apps (Mail, Contacts, Calendars, Reminders and Notes). Normally this would be done with a Mobile Device Management (MDM) solution, pushing out user personalised configuration profiles. But for those situations where a MDM isn’t feasible (possibly due to budget, resources, policy, etc.) or simply overkill this post should help you out. 

To make life easier for those without a MDM I have put together a bash script to automate the setup of Exchange accounts on OS X.


How it works

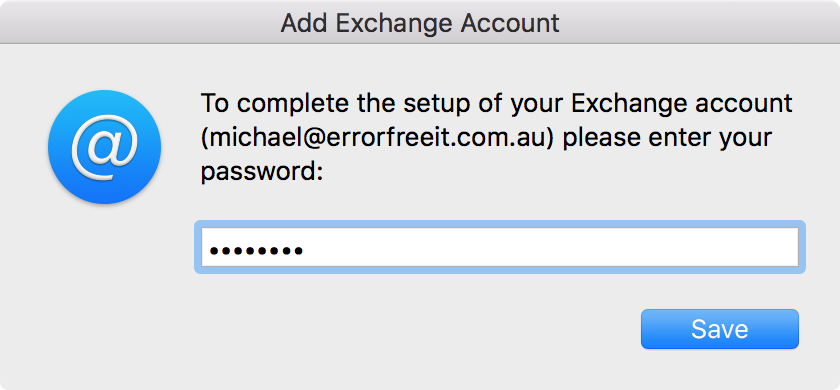
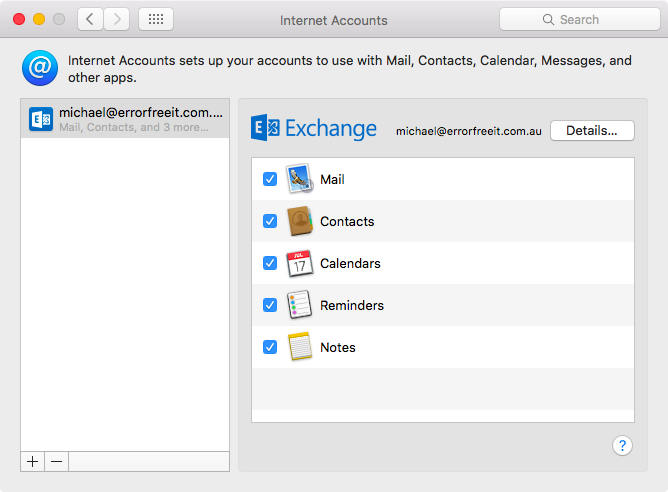
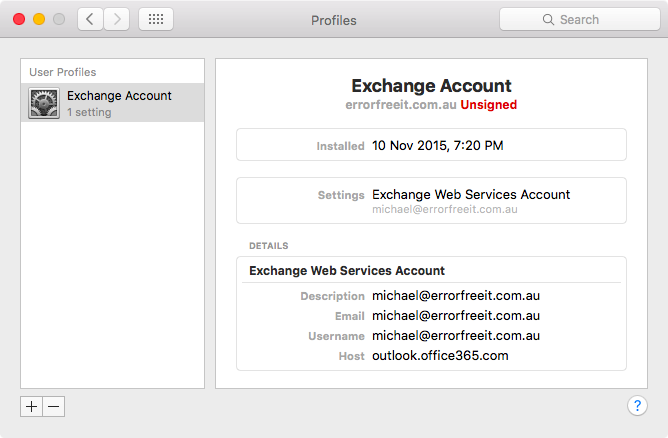
The script locally generates and installs a user configuration profile (.mobileconfig file). To avoid the account being added as offline the user is also prompted for their Exchange account password.

Usage

I have tested this script on OS X El Capitan (10.11) with multiple Office 365 Exchange accounts.

  1. Install Joseph Chilcote's Outset script.
  2. Download the addexchangeaccount.sh script and customise the required DOMAIN and EXCHANGE_HOST values.
  3. Then copy the customised script into /usr/local/outset/login-once/ and remember to make it executable.

That's it! The first time a user logs in they are prompted to enter their Exchange account password and then the script does the rest.

2 Comments

Flat Out of Time - Correcting the System Clock from the Login Window

9 Comments

Flat Out of Time - Correcting the System Clock from the Login Window

Some of the schools I work with have shared class sets of MacBooks. Their shared MacBooks are configured to connect to the school’s Wi-Fi (WPA2 enterprise network) at the login window. Sometimes the MacBooks are left in sleep mode for extended periods of time, causing the battery to deplete and the system clock to reset.

After the flat MacBooks are recharged and turned on, they fail to connect to Wi-Fi and this leads to users complaining that they cannot log in. This is due to the ‘Not Valid Before’ value of the Remote Authentication Dial-In User Service (RADIUS) certificate being ahead of the system clock.

Correcting this issue would require a user to first realise the time is incorrect and then connect the MacBook to the network with an Ethernet cable or more commonly bring the MacBook to an IT Administrator with access to a local administrator account.

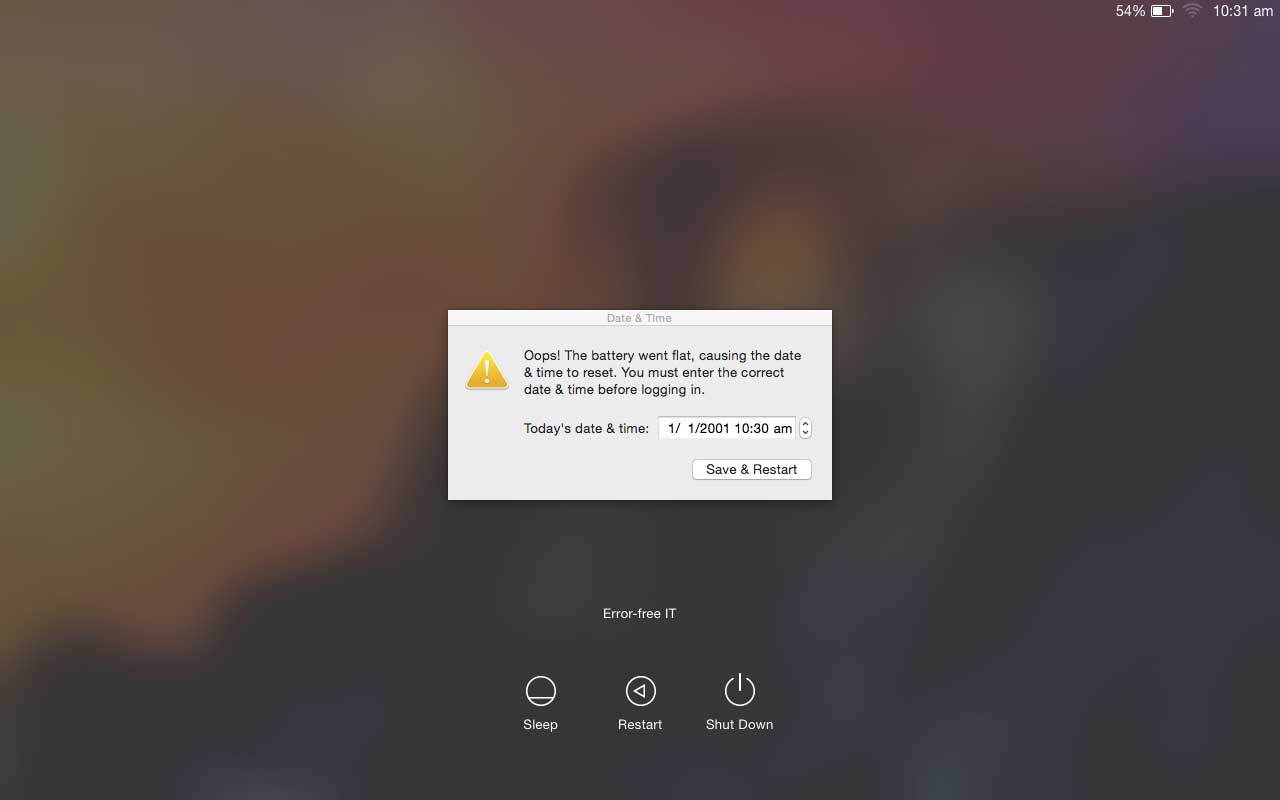
With the number of users coming to see me with this issue, I started looking into ways I could give the user the ability to correct the system time themselves from the login window and without an Ethernet cable. My idea was to create an application that appears over the top of the login window if the system clock is set to a date before 2015.

I found making an application visible at the login window surprisingly difficult. It wasn’t until I came across Apple’s PreLoginAgents sample code that I was a big step closer. Not long after that I had a working app that prompted users to correct the date and time after a flat battery.

To use, simply download the package from here and deploy it to your clients.

9 Comments

Deploy Finder's Sidebar List Favorites

2 Comments

Deploy Finder's Sidebar List Favorites

Recently I came across Matt Schalk's Change_Sidebar_list.py script for interacting with Finder’s sidebar list favorites.

His script really caught my attention as I have come across situations where network home directories are missing the default set of Finder sidebar favorites.

To easily deploy a standard set of Finder sidebar favorites I have created another script (setsidebarfavorites.sh) that interfaces with Matt’s Change_Sidebar_list.py script. This script was also created with Joseph Chilcote's outset in mind. Placing setsidebarfavorites.sh in /usr/local/outset/login-once/ will initially configure a user’s favorites and then leave it up to them to further customise.

Usage

1. Install changesidebarlist-1.0.pkg

2. Install outset.pkg

3. Install setsidebarfavorites-1.0.pkg


customisation

If you want to further customise the standard list of favorites included in setsidebarfavorites-1.0.pkg download and edit setsidebarfavorites.sh.

Once customised simply copy setsidebarfavorites.sh into /usr/local/outset/login-once/ on your client machines and correct the script's file permissions with:

sudo chown root:wheel /usr/local/outset && chmod -R 755 /usr/local/outset && xattr -rc /usr/local/outset

2 Comments

Separating System and User Data with DeployStudio

2 Comments

Separating System and User Data with DeployStudio

Some end-users seem to find new ways to mess-up their computers, instead of spending a lengthy time trying to undo the damage, IT Staff can simply reimage a Mac with DeployStudio.

Placing the operating system (OS X & Applications) and user data (home directories) on separate partitions makes the process of restoring/upgrading the operating system even faster as there is no longer a need to migrate user data. 

Below I have listed the steps to configure DeployStudio to set up Macs with separate partitions for operating system and user data.

Setup

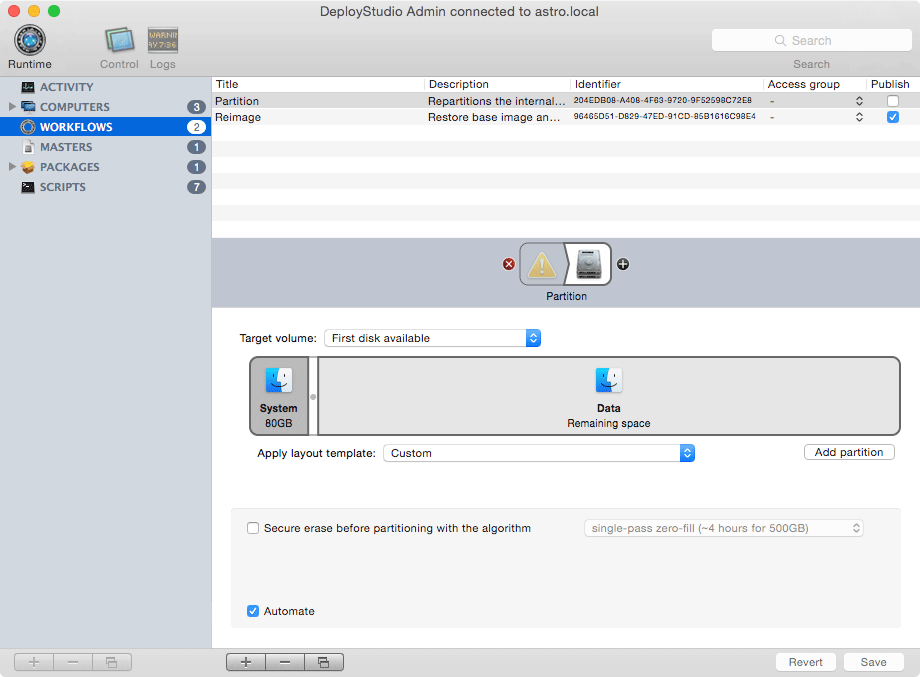
In DeployStudio create a new workflow titled ‘Partition’. The first item to add is a safeguard Alert task, followed by a Partition task. Allocate 80 GB to ‘System’ and the remaining space to the ‘Data’ partition. Also set ‘Target volume’ to ‘First disk available.’

Now edit your existing Reimage workflow. Before your ‘Restore’ task add a ‘Workflow’ task and set ‘Embed workflow’ to ‘Returned by script…’ and the script to ‘check_partitions.sh’. The check_partitions.sh script can be downloaded from here.

The check_partitions.sh script:

  • Skips partitioning if the System and Data partitions already exist.
  • Partitions the disk if neither System or Data partitions are found.
  • Aborts the DeployStudio workflow if only one of the partitions are found.

Under your ‘Restore’ task set the ‘Target volume’ to ‘System’ and ‘Rename volume’ to ‘System’.

After the ‘Restore’ task add a ‘Generic’ task, set the command to ‘redirect_users.sh’, check ‘Postponed execution’ and ‘Automate.’ The redirect_users.sh script can be downloaded from here.

The redirect_users.sh script:

  1. Removes the standard Users directory from the System partition. 
  2. Creates a symbolic link pointing Users to /Volumes/Data/Users.
  3. Recreates the /Users/Shared directory on the Data partition.


That’s it, happy reimaging!


Additional Information

Size Restriction
Unlike the standard single Macintosh HD partition layout, users are limited by the size of the Data partition. This can be an issue for small (<128 GB) MacBook Air SSDs. If your Macs are low on storage I recommend taking a look at this DeployStudio guide.

Always Backup
Although reimaging a machine with the above set up should not affect the Data partition you should always ensure your user has an up-to-date backup (e.g. Time Machine) beforehand.

No FileVault Support
Working mainly in school environments there has never been a demand for encrypting user data. Feedback from MacEnterprise.org members has brought to my attention that FileVault only encrypts the OS X partition (System) and not the Data partition. If you plan on using FileVault the only option is to keep everything on a single partition.

Missing Finder Icons
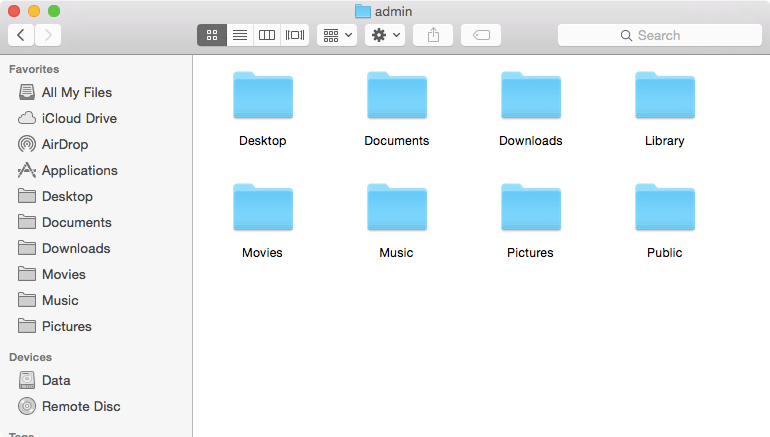
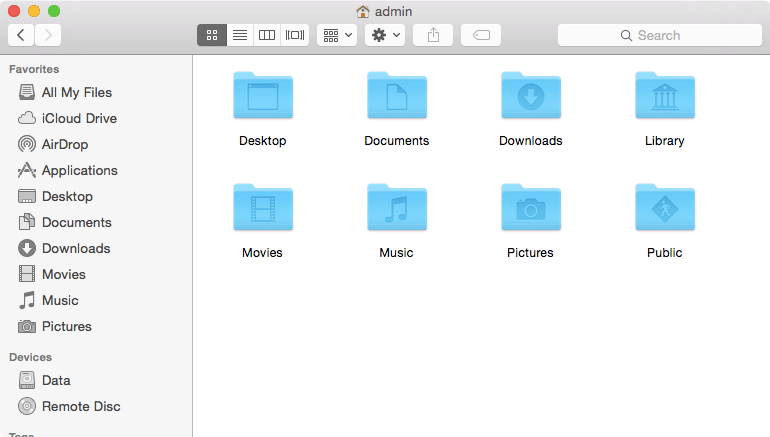
If a home directory path contains a symbolic link there is a bug in Finder where the pretty sidebar/home folder icons are missing. This issue occurs because we are using a symbolic link to redirect the Users directory.

To correct this issue OS X needs to be updated with the actual path to the user’s home directory. This can be done in System Preferences > Users & Groups, unlock the preferences and right click your user account > Advanced Options and update ‘Home directory,’ with the actual path (e.g. /Volumes/Data/Users/mpage).

This can also be achieved in Terminal with the ‘dscl' command by updating a user’s ‘NFSHomeDirectory’ attribute.

To automate this for school environments I have created a LaunchDaemon script, set to run on startup. This script updates all local user accounts with their actual home directory paths. You can download the script from here.

2 Comments

Capturing Package Files with PkgKeeper

3 Comments

Capturing Package Files with PkgKeeper

Deploying software via Munki is an excellent asset to sites managing fleets of Macs. Sometimes however, a package will not be listed directly on Apple's Support website and also may not be taking advantage of OS X Server's Caching Service. This is why I created the script PkgKeeper. The script works by monitoring filesystem access and if a pkg or dmg file is detected a hard link of the file is created on the user’s desktop.

At this point you may be asking yourself “what is a hard link?” Every unique file on a Unix (the foundation of OS X) filesystem has an inode (index node). One of the attributes of an inode is ‘link count.’ The link count is the number of hard links to a file.

Normally a file has a link count of just one, but when a new hard link is created that link count is incremented by one. Naturally, removing a file decrements the link count by one. It is not until the link count reaches zero that the inode is removed and the space is marked as available for use.

Under normal circumstances once an update package is installed and the package is removed the file's link count goes from one to zero. However, PkgKeeper creates another hard link of the file while it is still in use setting the file's link count to two. This stops the file from hitting a link count of zero and being completely removed.


Using The Script

Open Terminal and paste the following to download the script:

curl -O https://raw.githubusercontent.com/Error-freeIT/PkgKeeper/master/pkgkeeper.sh

Make the script executable:

chmod +x pkgkeeper.sh

Run the script:

sudo ./pkgkeeper.sh

Start downloading an update and watch as the script captures the package file.

Note for OS X 10.11 users: El Capitan's System Integrity Protection prevents this script from working. To temporally disable SIP boot into a recovery partition or 10.11 USB installer, open Terminal and type 'csrutil enable --without dtrace'.

Bonus Tips

In Terminal you can view a file's link count with the command:

stat -f '%l' FILE_NAME

The inode also contains the User ID, Group ID and file mode attributes of the file. Therefore all hard links will have the same user, group ownership and access permissions.

Once the update is installed the original process deletes its hard link to the file. This means it is no longer accessing the file and we are safe to edit the file's ownership. The easiest way to do this is by editing the 'Sharing & Permissions' section in the 'Get Info' window.

3 Comments

Installing & Automating AutoPkg with a Launch Daemon

2 Comments

Installing & Automating AutoPkg with a Launch Daemon

UPDATE (1/12/15): Since AutoPkgr now supports recipe overrides I recommend using AutoPkgr over my headless script.


AutoPkg is a great tool for downloading and packaging software for distribution. It also integrates nicely with Munki. After testing AutoPkg I looked into methods to further automate the updating process. I came across Sean Kaiser’s blog detailing how he created a script and triggered it using a launch daemon. I took his script as an example and began to build my own, with a few extra tweaks.

My AutoPkg Wrapper triggers AutoPkg to run once daily at 8:30am, dynamically checking for updates to user recipe overrides and sending an email in the event of a new package.

Without further ado I will walk you through setting up AutoPkg and automating it with my AutoPkg Wrapper.

Note: If you haven’t already, it is important to install Munki and AutoPkg.


Configuring AutoPkg

First we need to add the main recipe repository to AutoPkg, we do this by opening Terminal and typing:

autopkg repo-add http://github.com/autopkg/recipes.git

Note: AutoPkg requires Git to be installed, if it is not installed you will be prompted to install it from Apple Software Update.

Next we need to set the location of our Munki repository:

defaults write com.github.autopkg MUNKI_REPO "/PATH/TO/MUNKI_REPO"

AutoPkg uses recipe overrides to override default or unspecified recipe attributes. My Munki repositories follow a consistent naming convention and therefore I create recipe overrides for every AutoPkg recipe used. Below are the criteria for packages added to my Munki repositories:

  • Packages are placed directly into pkgs and not into subdirectories.
  • Packages are named in lowercase (e.g. Firefox.dmg > firefox.dmg).
  • Packages do not contain the developer’s name (e.g. googlechrome.dmg > chrome.dmg).
  • Packages are initially added to the development catalog.
  • The pkginfo display_name attribute is set to match the package name with proper case and spaces (e.g. flashplayer.dmg > Flash Player).
  • The unattended_installs pkginfo attribute is disabled.
  • The developer and category pkginfo attributes are set.


Optionally you can download and install my collection of AutoPkg recipe overrides from GitHub:

git clone https://github.com/Error-freeIT/AutoPkg-Recipe-Overrides.git ~/Library/AutoPkg/RecipeOverrides


With AutoPkg configured let’s test a recipe:

autopkg run -v AdobeFlashPlayer.munki

Automating AutoPkg

If that worked it’s time to automate AutoPkg, download and run the autopkgwrapper installer:

git clone https://github.com/Error-freeIT/AutoPkg-Wrapper.git /tmp/autopkgwrapper && cd /tmp/autopkgwrapper && sudo ./install.sh

The install script requires administrator privileges and therefore will prompt for a password, as it copies the script and launch daemon into place and opens the script in Nano for configuration.

Update the ACCOUNT_NAME value to match the account name (a.k.a. username) containing the recipe overrides and update the EMAIL_FROM and EMAIL_TO addresses.

Note: To save changes in the Nano text editor press control + X, type y and hit return.

That’s it! Once set up you will be emailed when new items are added to the Munki repository. Standard workflow would then involve testing the new software and if the new software is stable, simply add it to your production catalog.


Troubleshooting The AutoPkg Wrapper

This AutoPkg Wrapper was intended to only be run as a launch daemon (by root) to manually run the AutoPkg Wrapper type:

sudo "/Library/Scripts/AutoPkg Wrapper/autopkgwrapper.sh"

You can update your email settings by typing:

sudo nano "/Library/Scripts/AutoPkg Wrapper/autopkgwrapper.sh"

By default the installed launch daemon is set to run daily at 8:30am, if you want to further customise how often the script is run I recommend editing the launch daemon with Lingon X.

2 Comments

DeployStudio Rsync Backup & Restore User Data

4 Comments

DeployStudio Rsync Backup & Restore User Data

The MacBook Air is a great laptop and thanks to its SSD (Solid-state Drive), it provides impressive read and write speeds. The only problem is that SSD storage is expensive and the approach of storing user data on a separate partition becomes unfeasible with the limited space. One site running a fleet of 64GB MacBook Airs found themselves manually backing up user data before reimaging, then manually restoring the user's data.

To help improve their workflow, I investigated methods of backing up user data during reimaging with DeployStudio. I came across the BackupRestore scripts by Rusty Myers and they looked great for backing up and restoring over a gigabit network (up to 125 MB/s). However, since all reimaging at this site occurs in the I.T. Office, I wanted to make use of the jaw-dropping speeds of USB 3.0 (up to 525 MB/s) and Thunderbolt (up to 1.25 GB/s). Of course, real world transfer rates are less due to disk read/write speeds, but it’s still a substantial improvement over gigabit Ethernet speeds.

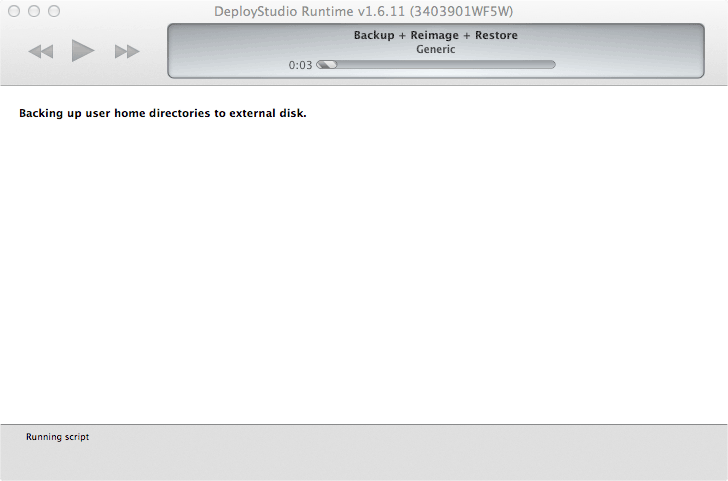
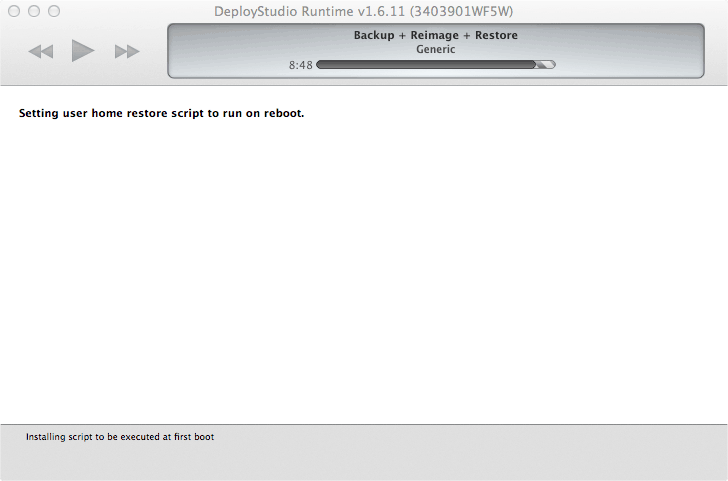
My solution involves two scripts, a backup script ran just before DeployStudio reimages the internal disk and a restore script executed on first boot.

To further speed up the backup/restore process, unwanted data is skipped with rsync’s --include-from option, allowing pattern filtering of the items backed up and restored. A good example use is skipping the restore of ~/Library/Caches directories.

Setup

Setting up the required workflows is straightforward and takes approximately 10 minutes. To try it out simply follow the steps below.

Download backup.sh, restore.sh, backup_filter.txt and restore_filter.txt from GitHub here.

Copy backup.sh and restore.sh into your DeployStudio Scripts directory.

Copy backup_filter.txt and restore_filter.txt into your DeployStudio Files directory.

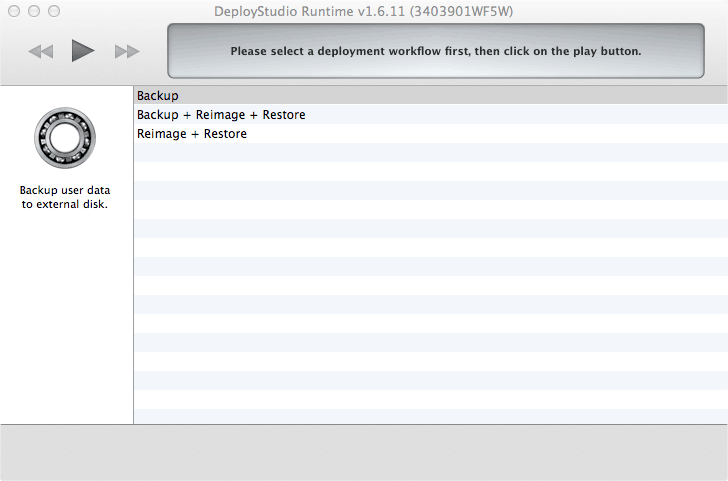
Open DeployStudio and create a workflow called 'Backup', add a ‘Generic’ script task and select backup.sh from the ‘Command’ drop-down list.

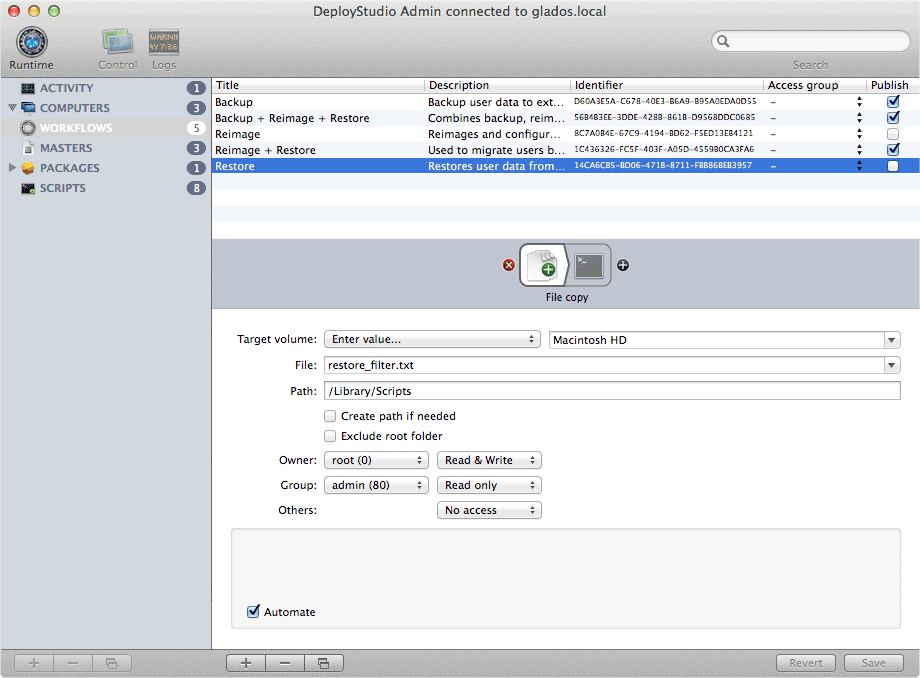
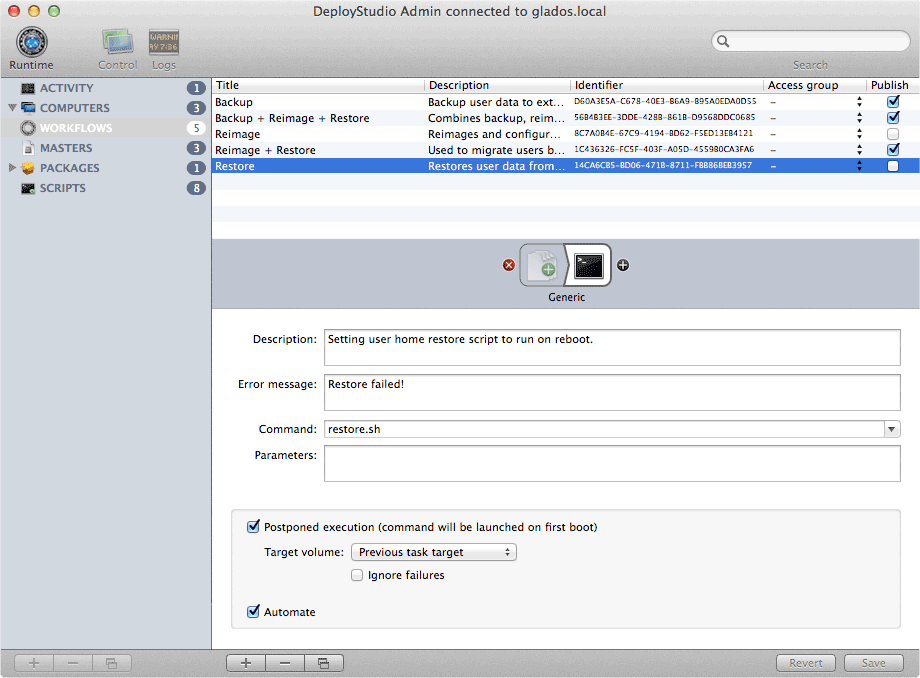
Create another workflow called ‘Restore’ and add a file copy task. Set the ‘Target volume’ to ‘Macintosh HD’, select ‘restore_filter.txt’ from the ‘File’ drop-down list and set the ‘Path’ to ‘/Library/Scripts’. Add a ‘Generic’ script task and select ‘restore.sh’ from the ‘Command’ drop-down list and check ‘Postponed execution (command will be launched on first boot).’

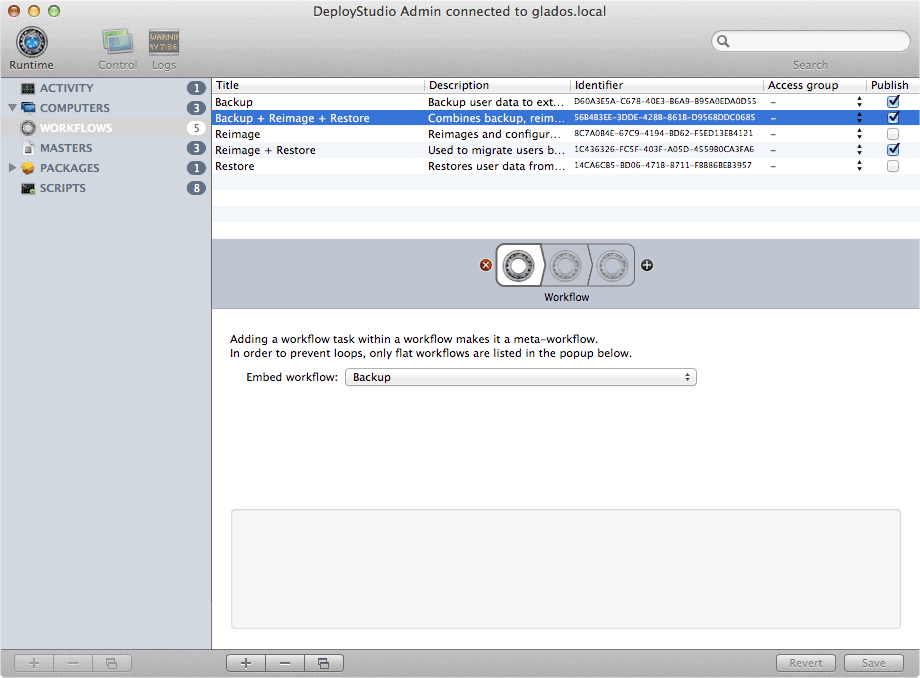
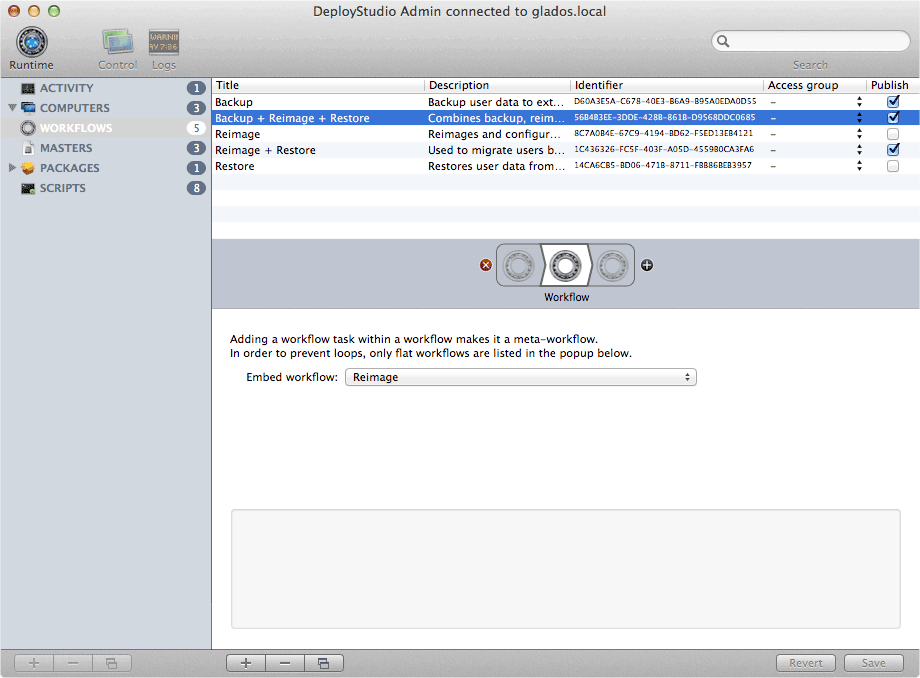
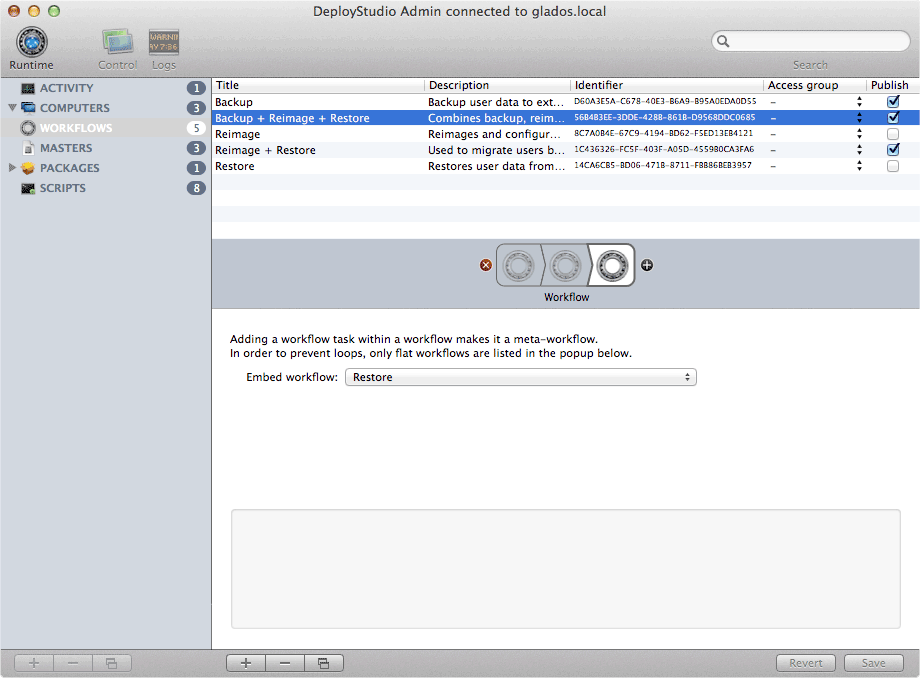
Create a third workflow called ‘Backup + Reimage + Restore’ and drag over three ‘Workflow’ tasks. As you can probably guess, the first ‘Workflow’ task is set to ‘Backup’. The second is your standard workflow for reimaging and the last is ‘Restore’.

Duplicate this workflow, rename it to ‘Reimage + Restore’ and remove the first backup ‘Workflow’ task. This workflow is used to restore a backup to a different Mac.

Lastly, uncheck the Publish checkboxes next to your reimage and ‘Restore’ workflows.

Time To Test

Before proceeding make sure you have a backup of any important data!

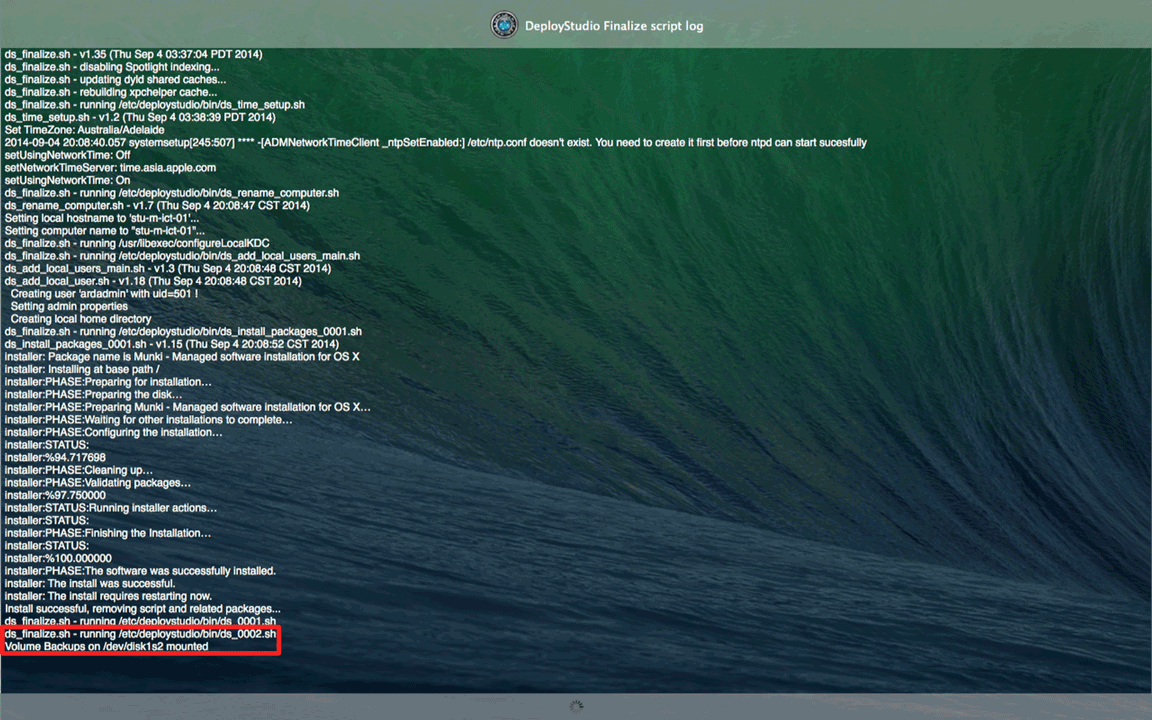
Format a USB/Thunderbolt/FireWire external disk, with the name 'Backups' and connect it to a Mac you wish to reimage.

NetBoot into DeployStudio and test out the new workflows.

Rapid Backup & Restore

Unfortunately, todays MacBook Airs only have one Thunderbolt port and during reimaging, that port is taken up by a Thunderbolt to gigabit Ethernet adapter. Although untested, I believe a Belkin Thunderbolt Express Dock would allow NetBooting into DeployStudio while attaching a Thunderbolt SSD.

Mac Migration

To migrate a user from one Mac to another, first run the the Backup workflow to take a backup of the source Mac. Connect the external disk to another Mac you will see a directory with the serial number of the source Mac. Simply rename the directory to the serial number of the destination Mac. Connect the backup disk to the destination Mac and then run a ‘Reimage + Restore’ workflow on the new Mac.

It is important to note that the restore script does not recreate user accounts, it just transfers user home directories. This is by design as the creation of the mobile account occurs when a user logs into the Mac for the first time.

Backup Archive

After successfully restoring a backup, it is moved into /Volumes/Backups/Restored/. This allows for recovery of any files that may have been skipped during restore, due to restore_filter.txt rules.

4 Comments

PHP ARD (Apple Remote Desktop) Import List Generator

6 Comments

PHP ARD (Apple Remote Desktop) Import List Generator

In the past, adding new computers to Apple Remote Desktop has been through either Bonjour discovery (local subnet) or scanning IP address ranges. These methods work great until you have hundreds of Macs and your ARD computer list starts to become out of sync from your colleagues.

Since we keep an asset database tracking our Mac's hostnames and last known IP addresses, I have written a PHP function for generating an ARD friendly import file.

You can find the source code on GitHub here.

This function only requires a filename and an array of Mac's with their hostname and last known IP address. Examples of these are included at the top of ardgen.php. With very little work, this script could be integrated into any database containing Mac's with their recent IP addresses.

An earlier version of this function also included device MAC addresses. However, during a migration to a new database, MAC address information was not ported over, therefore the optional MAC address data was removed from the plist generation. If you have access to the MAC addresses of your computers it is worth including it in the plist.

How to import an ARD import list file

Open Apple Remote Desktop and click 'File' > 'Import List...'

Select your newly created plist file.

Assuming all your Mac's use the same Remote Management user account, uncheck 'Verify user name and password before adding' and then click 'Add.'

With a single import, all your Macs are now in ARD!

6 Comments